How To Enable SMTP and Change SMTP Settings in Gmail
Şevval Koç

Introduction
Simple Mail Transfer Protocol or SMTP is a protocol like your Internet Protocol (IP Address). It is part of the application layer of the TCP/IP protocol. It works with your MTA or Mail Transfer Tool to send your message to the desired computer or recipient. MTA is an SMTP Server.
SMTP controls how the email you send is moved from your MTA to another MTA. The Simple Mail Transfer Protocol provides a set of codes that make it easy to communicate via email between email servers (just like your web servers). SMTP helps to divide the message into different parts that only email servers can process.
How Does SMTP Work?
SMTP establishes a connection with the receiving server, and with the server’s approval, your e-mail message is sent to the recipient’s inbox. It may not be certain that all e-mails will fall into the inbox. In some cases, e-mails may also end up in the junk or spam box. You can learn about how SMTP works in a situation where user A wants to send an e-mail to user B.
The client of user A, called client, first sends a request to the mail server of user B. This request is sent by SMTP. The server, which checks whether there is any unwanted data in the e-mail, approves after some checks and the mail falls into the inbox of user B’s e-mail. Simple Mail Transfer Protocol usually uses ports 25, 465, and 587.
On the other hand, this protocol also uses 3 different security layers. These are SSL and TLS. While port 25 is used between servers that send and receive mail, if secure shopping is desired, port 465 is preferred by using one of the SSL or TLS layers. In short, authentication on port 25 is not mandatory. To prevent spam emails, the TLS layer is generally used with port 587.
Why Do You Need to Setup SMTP Settings in Gmail?
SMTP settings are required when you need to:
- Send transactional emails directly from your website.
- Install an SMTP plugin such as the Gmail SMTP plugin to send other emails.
- Configure Gmail in an external client such as Microsoft Outlook.
SMTP allows your website or webmail client to communicate with the Gmail Google App and makes sure your email process works the way you want it to.
For sending emails, Google’s free Gmail SMTP servers can create advantages for you. In this guide, you will learn how to setup Gmail SMTP settings.
What will you need?
Before you start this guide, you will need the following:
- Gmail or G Suite account
- Hosting control panel access
1) Sign in to your Gmail account.
2) Go to: https://www.google.com/settings/security/lesssecureapps
- To allow a third party to access your email address, you need to enable the “Less Secure App Access” feature.
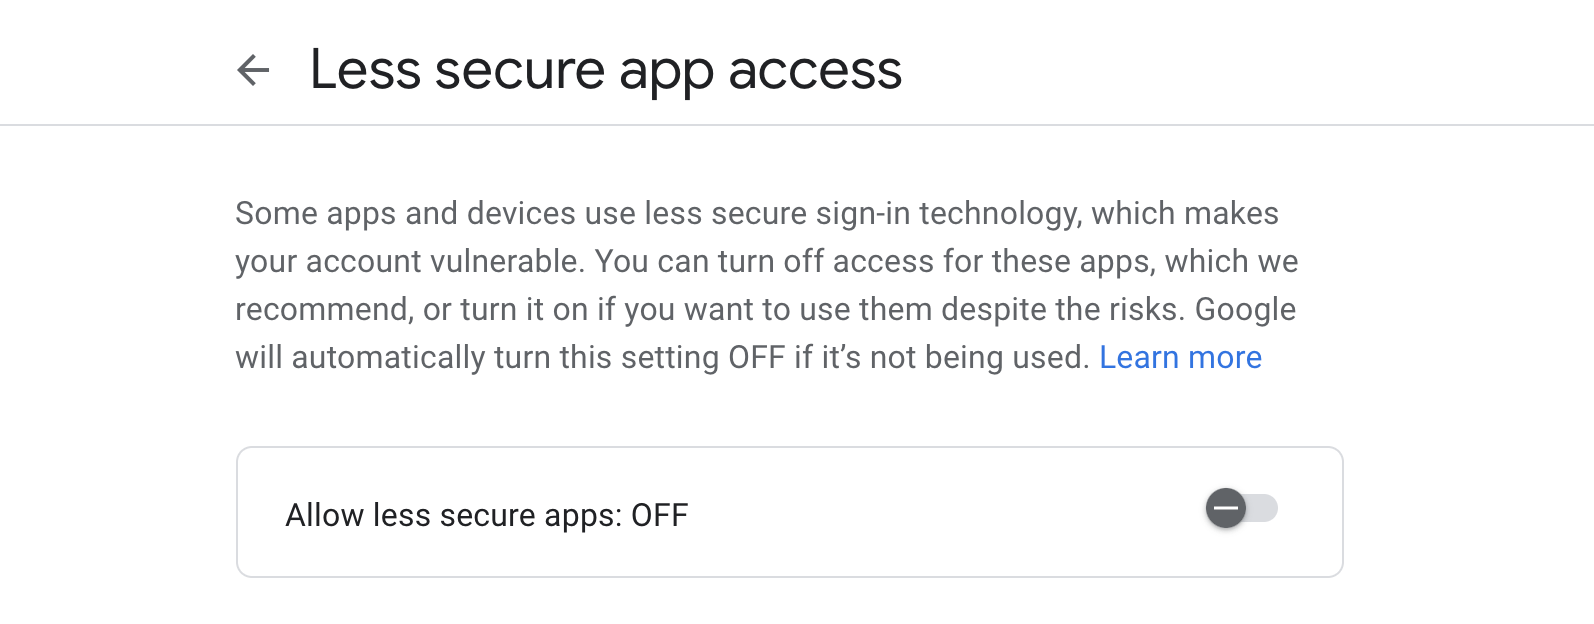
3) Turn on Allow Less Secure Apps.
- An email will then be sent to your account confirming that less secure apps are allowed.
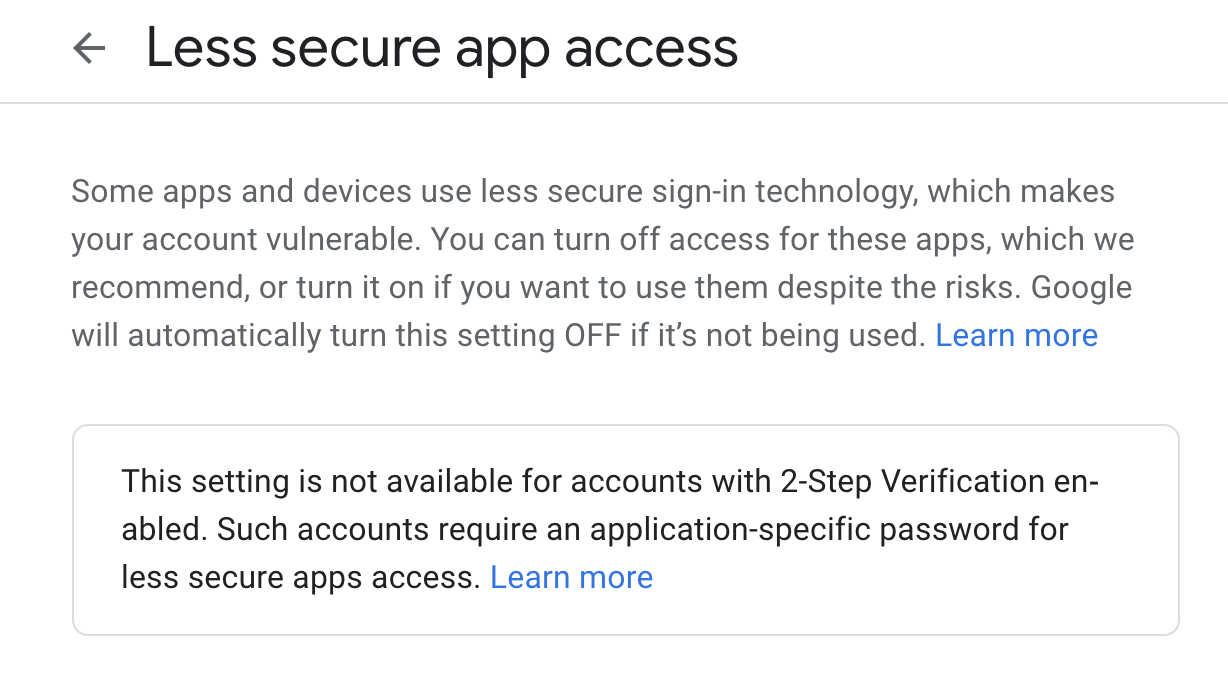
- The Less Secure App Access feature is not available if you have two-factor authentication enabled in your G Suite or Gmail account. In this case, the following message is displayed:
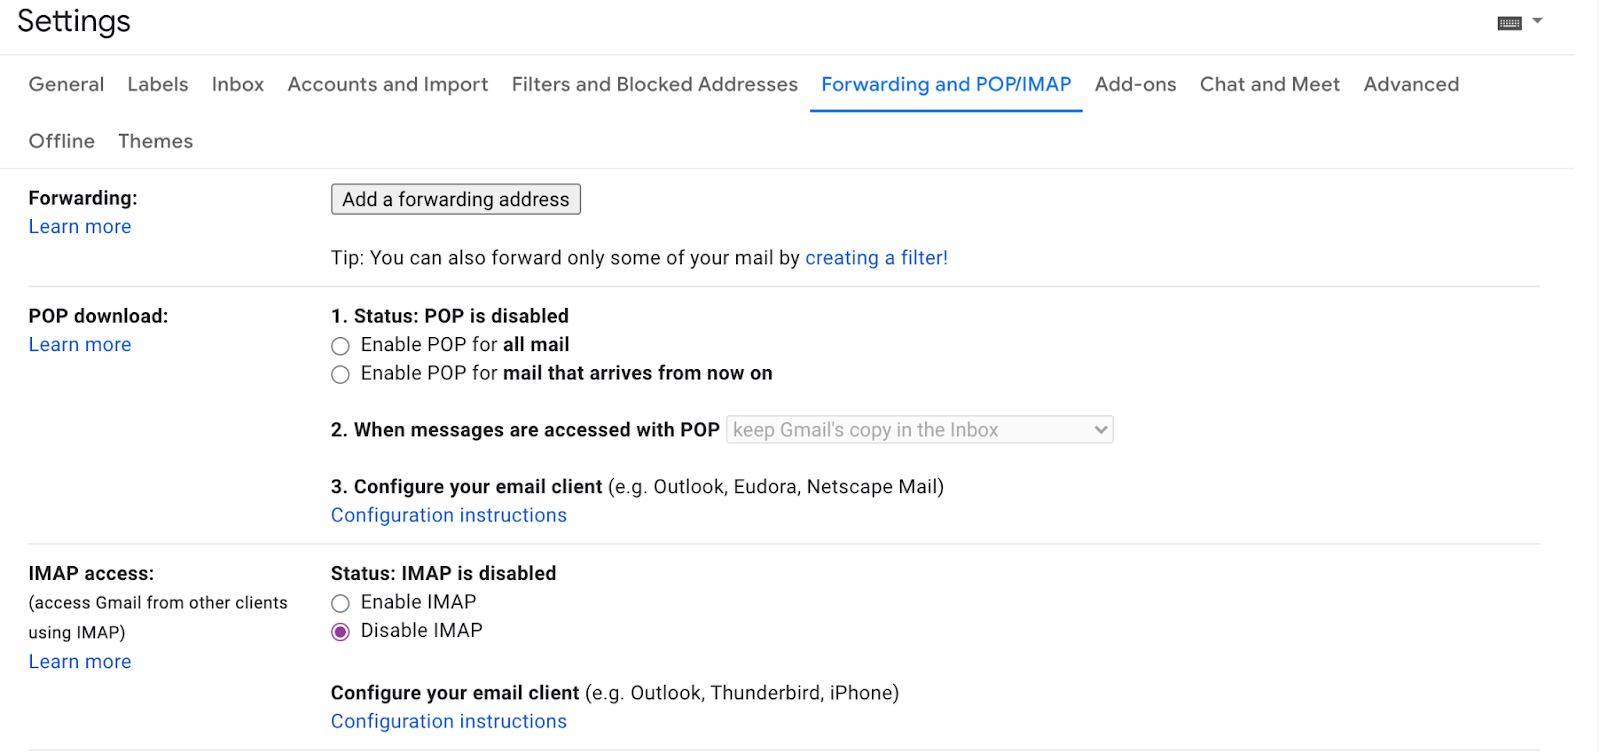
4) Go to settings in your Gmail account.
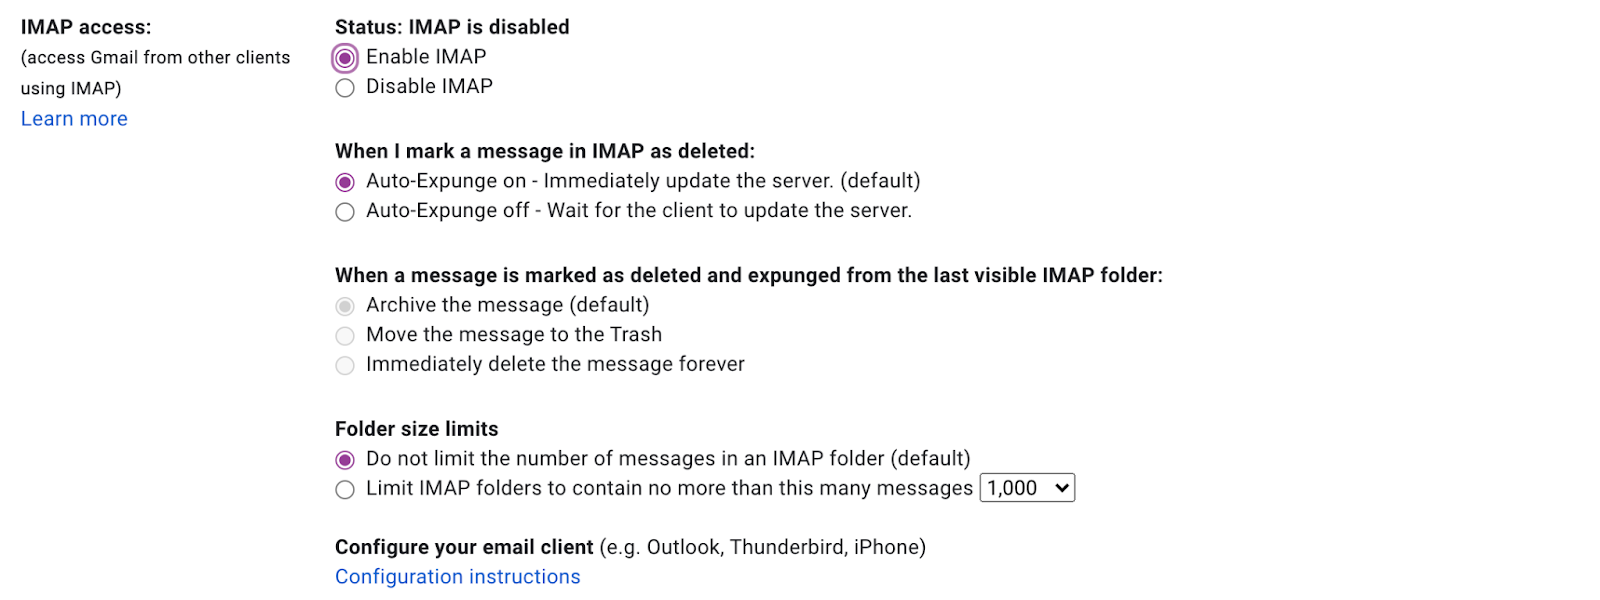
5) Select Forwarding and POP/IMAP settings.
Connecting Your Gmail or SMTP Account to Juphy
You can now add your Gmail accounts to Juphy.
1) For this, after opening your account in Juphy, select the Gmail option from the “Channels” tab.
2) Select the Gmail section from the “Channels” section and select the “Add Gmail Account” option.

3) After selecting the “Add Gmail Account” section, you will see the login section to your Google account. After entering your Gmail information here, you give the necessary approvals on the permission screen.
4) After entering the information, you will be directed to the Juphy screen.
It is also quite simple to add your SMTP mail to your Juphy account. You can proceed by following the process below.
1) Once you’ve done that, log into your Juphy account and go to the “Channels” tab.
2) From here, select Email-SMTP/IMAP.
3) Click on “Add Email Account”.

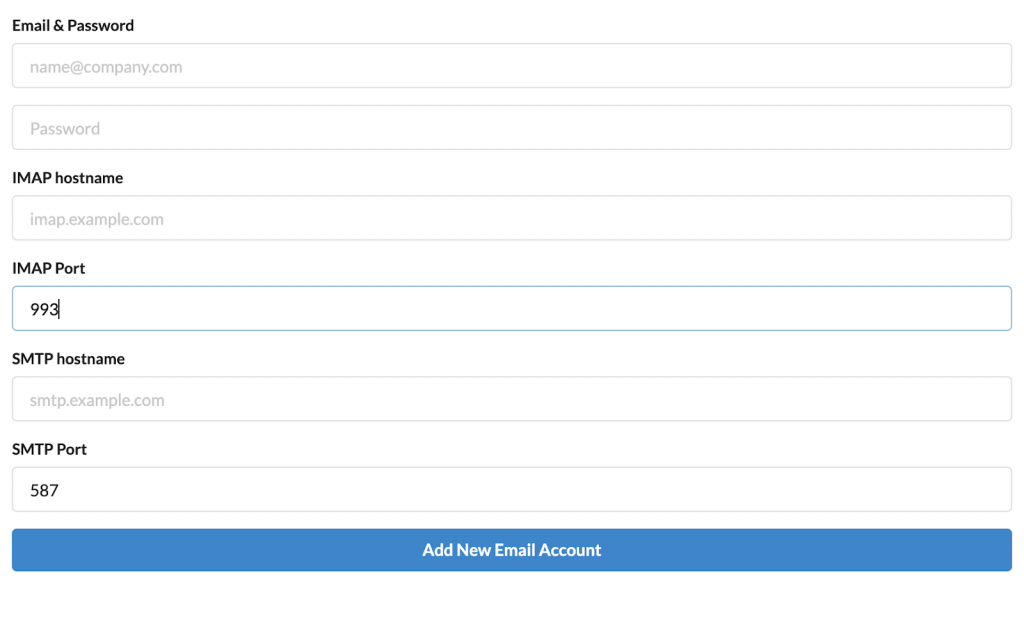
4) Enter the email address and password you will use and fill in the other information as stated below.
- Server: smtp.gmail.com
- Encryption/Authentication: SSL
- Port: 465
or
- Server: smtp.gmail.com
- Encryption/Authentication: StartTLS
- Port: 587
You can easily access all the messages that come to your inbox in your account that you have connected to Juphy, and you can reply to them all via Juphy.
You can create automatic replies for incoming notifications. In this way, you can easily send a quick reply to incoming notifications.
After adding your team to Juphy, you can assign incoming e-mails to the relevant person. This way you can optimize the process.
You can divide your emails into tags. You can divide it into sections such as optimistic and negative, and you can easily make appropriate turns. In this way, you can easily find your mail after parsing it.
In this article, we have touched on many different topics. We started with what SMTP is, talked about SMTP integration with Gmail, and then we talked a lot about Juphy and its benefits. Still, in your mind “I wonder if using Juphy makes it easier for me to control the customer experience? What other features does Juphy have?” If you are wondering, you can start your 7-day free trial right away without the need for your credit card information.
Managing a shared email inbox will make sure that you and your team are collaborating like champions on customer communications, and always improving for a better support service.

