WhatsApp Cloud API: Sending Messages and Receiving
Erdi Balcioglu
When you successfully finish this 5-minute no-code implementation, you’ll be able to send bulk WhatsApp messages and also receive incoming customer messages for your business.
To connect WhatsApp Cloud API to Juphy, it is required to enable Whatsapp Product on Meta Developer App. So let’s start!
Step 1 – Creating a Meta Developer App
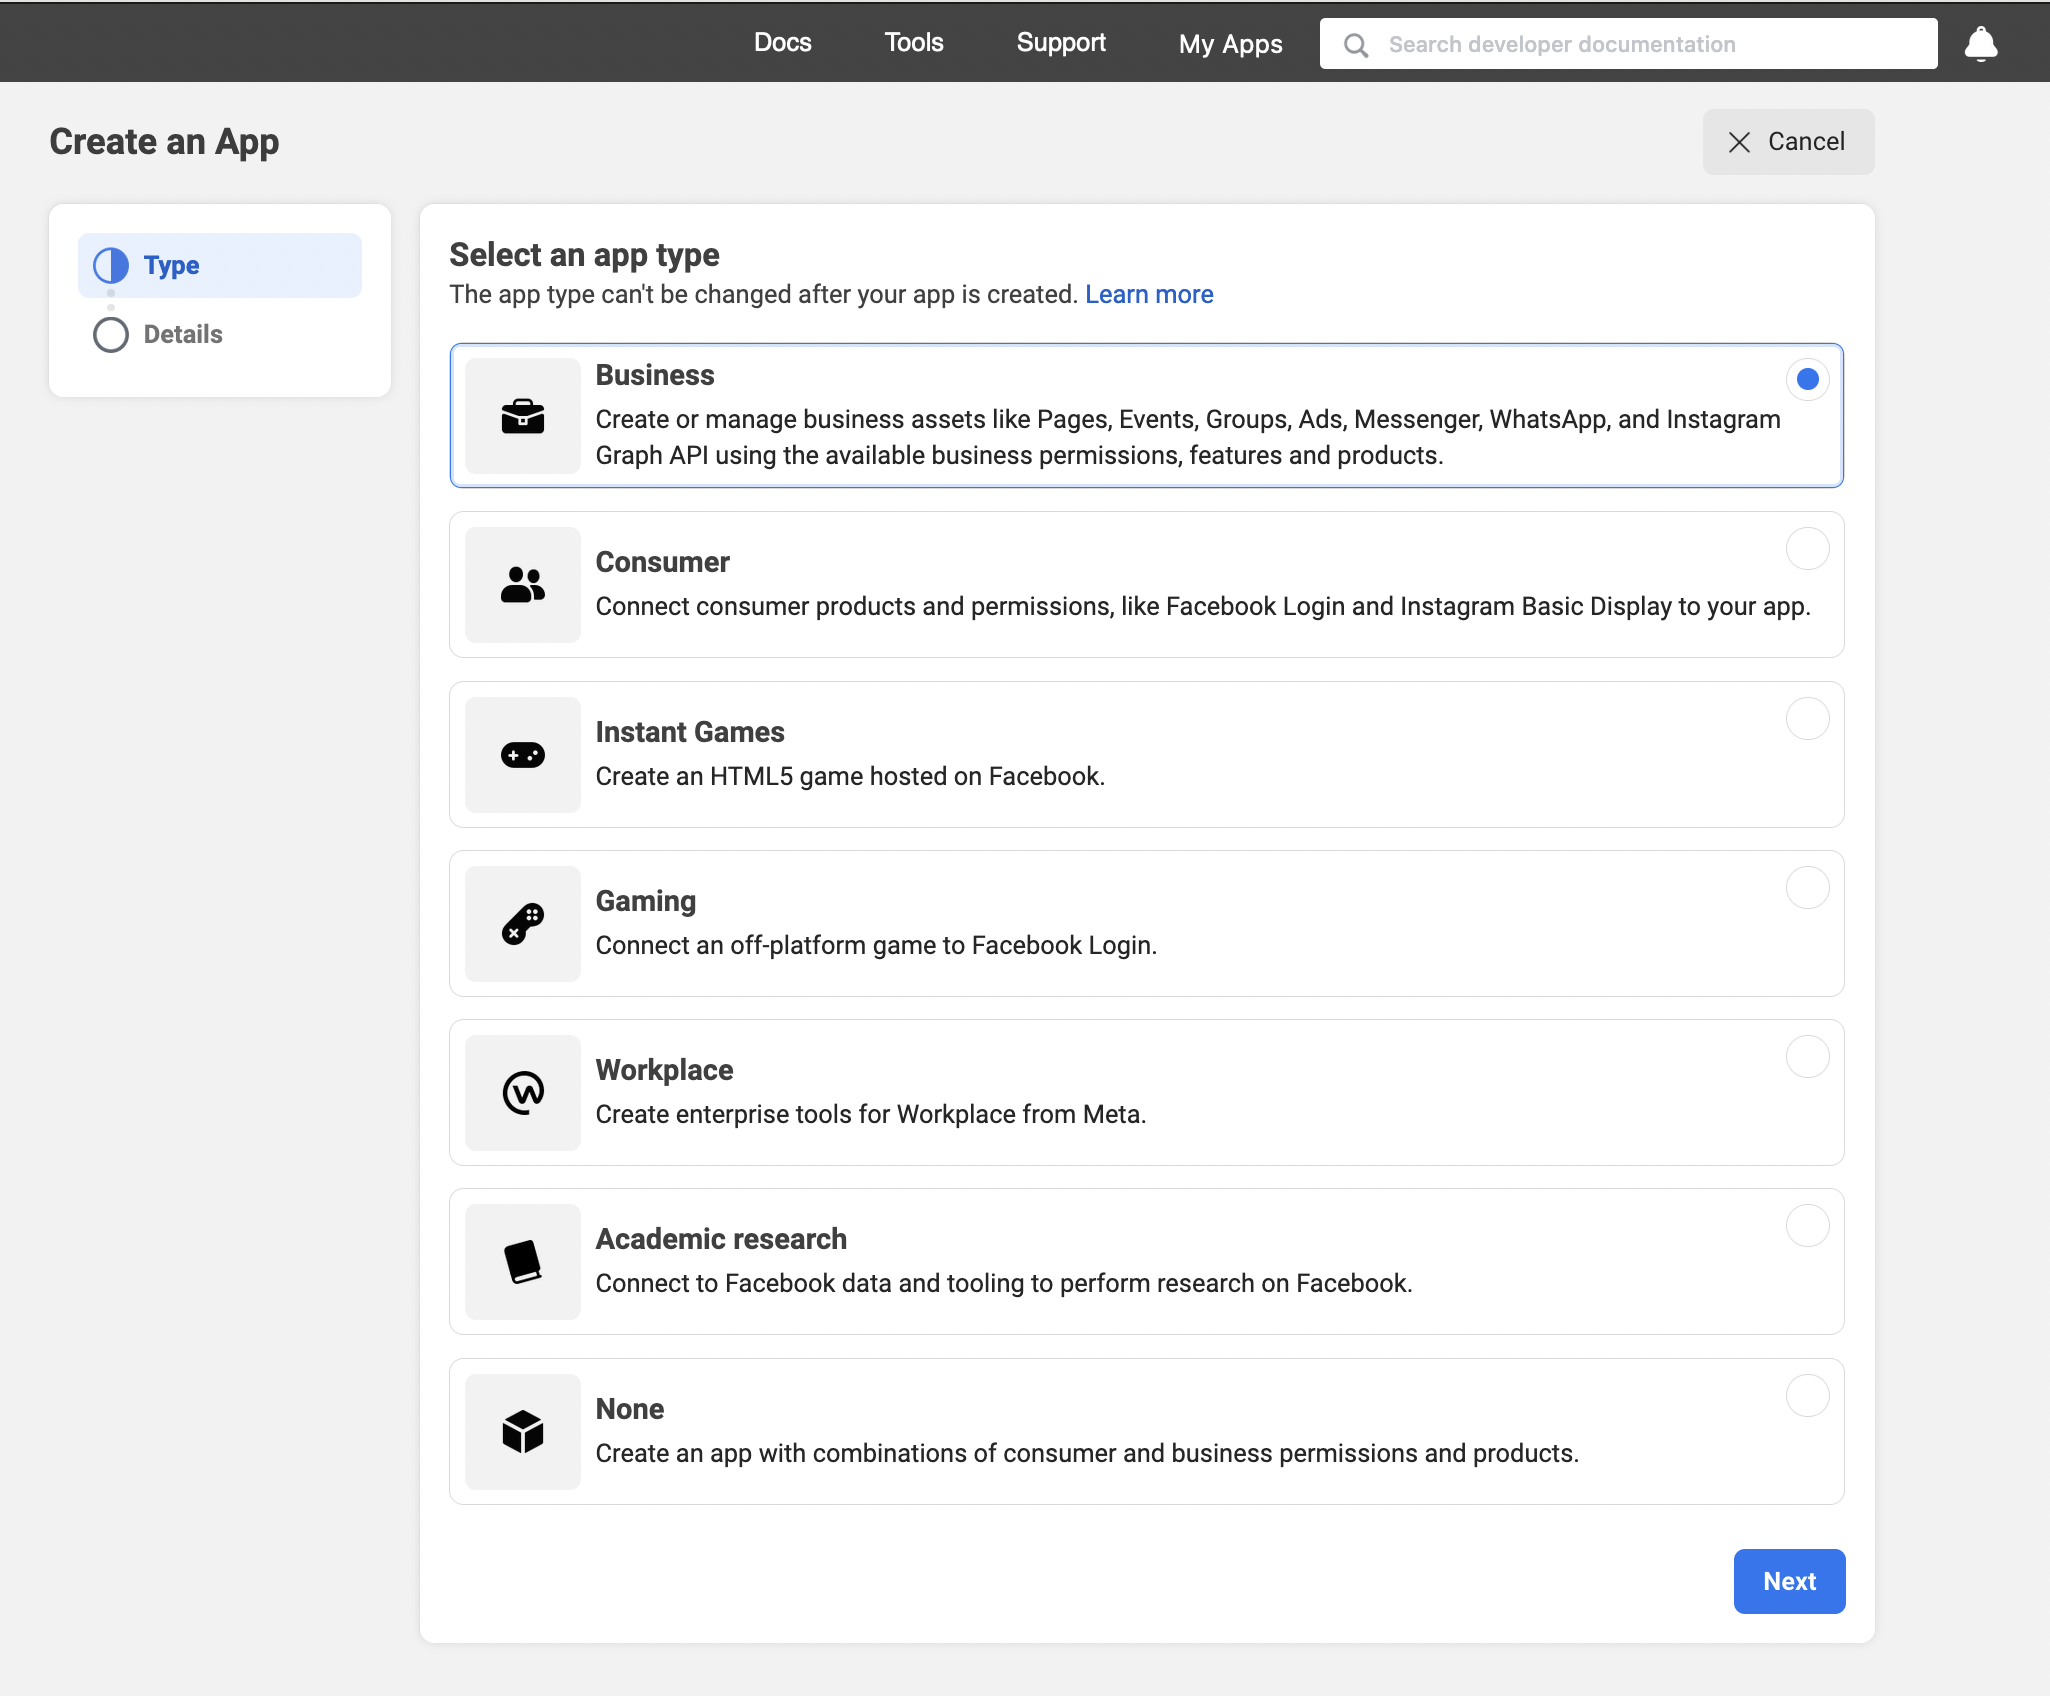
Go to https://developers.facebook.com/apps/create/ and select “Business” as the app type;
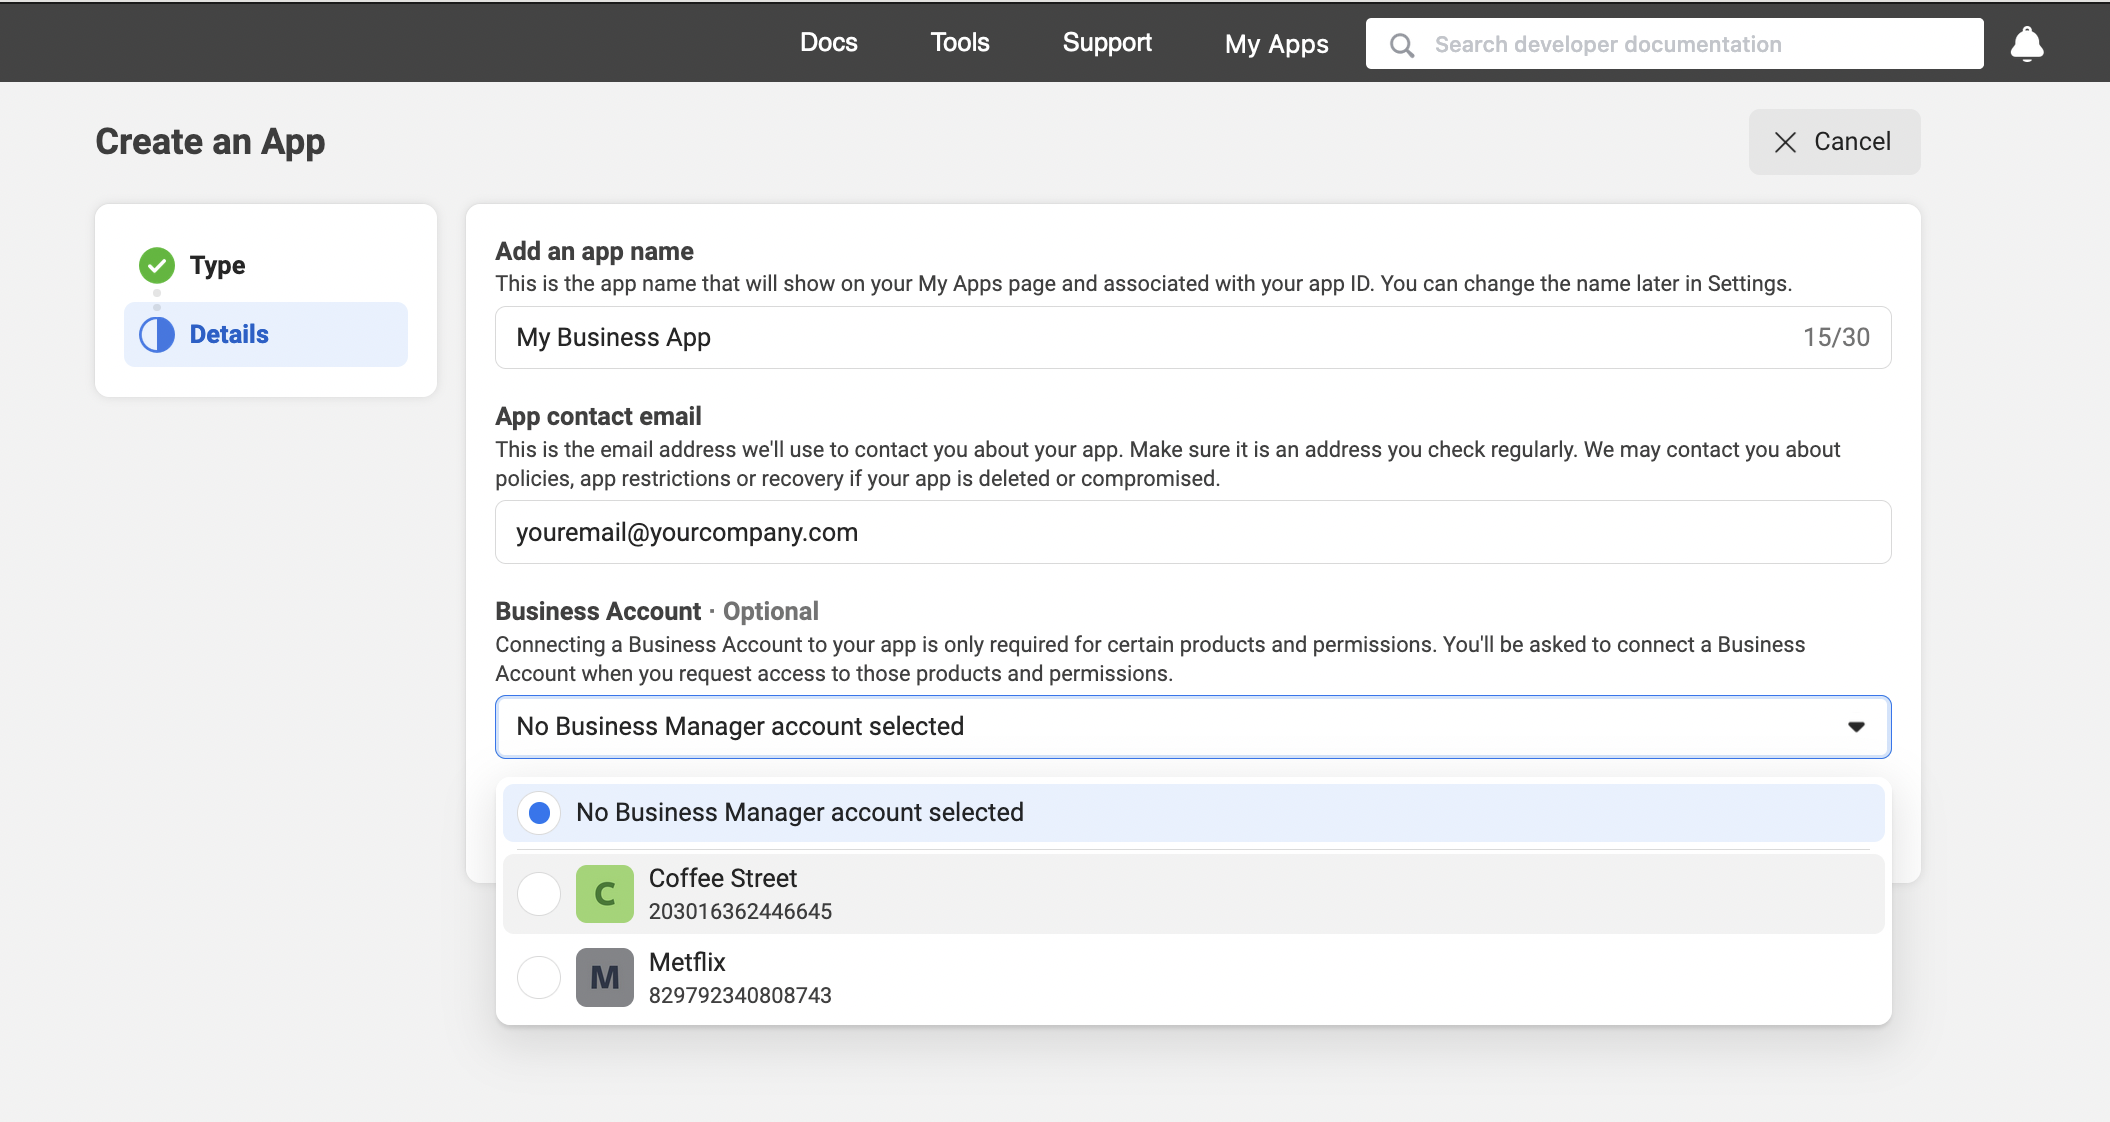
Enter an app name and contact email; you can give any name. In this example, we used My Business App. In the third step, select your business account. In this example, our business account was Coffee Street.
Step 2 – Activate WhatsApp Section in your Meta Developer App.
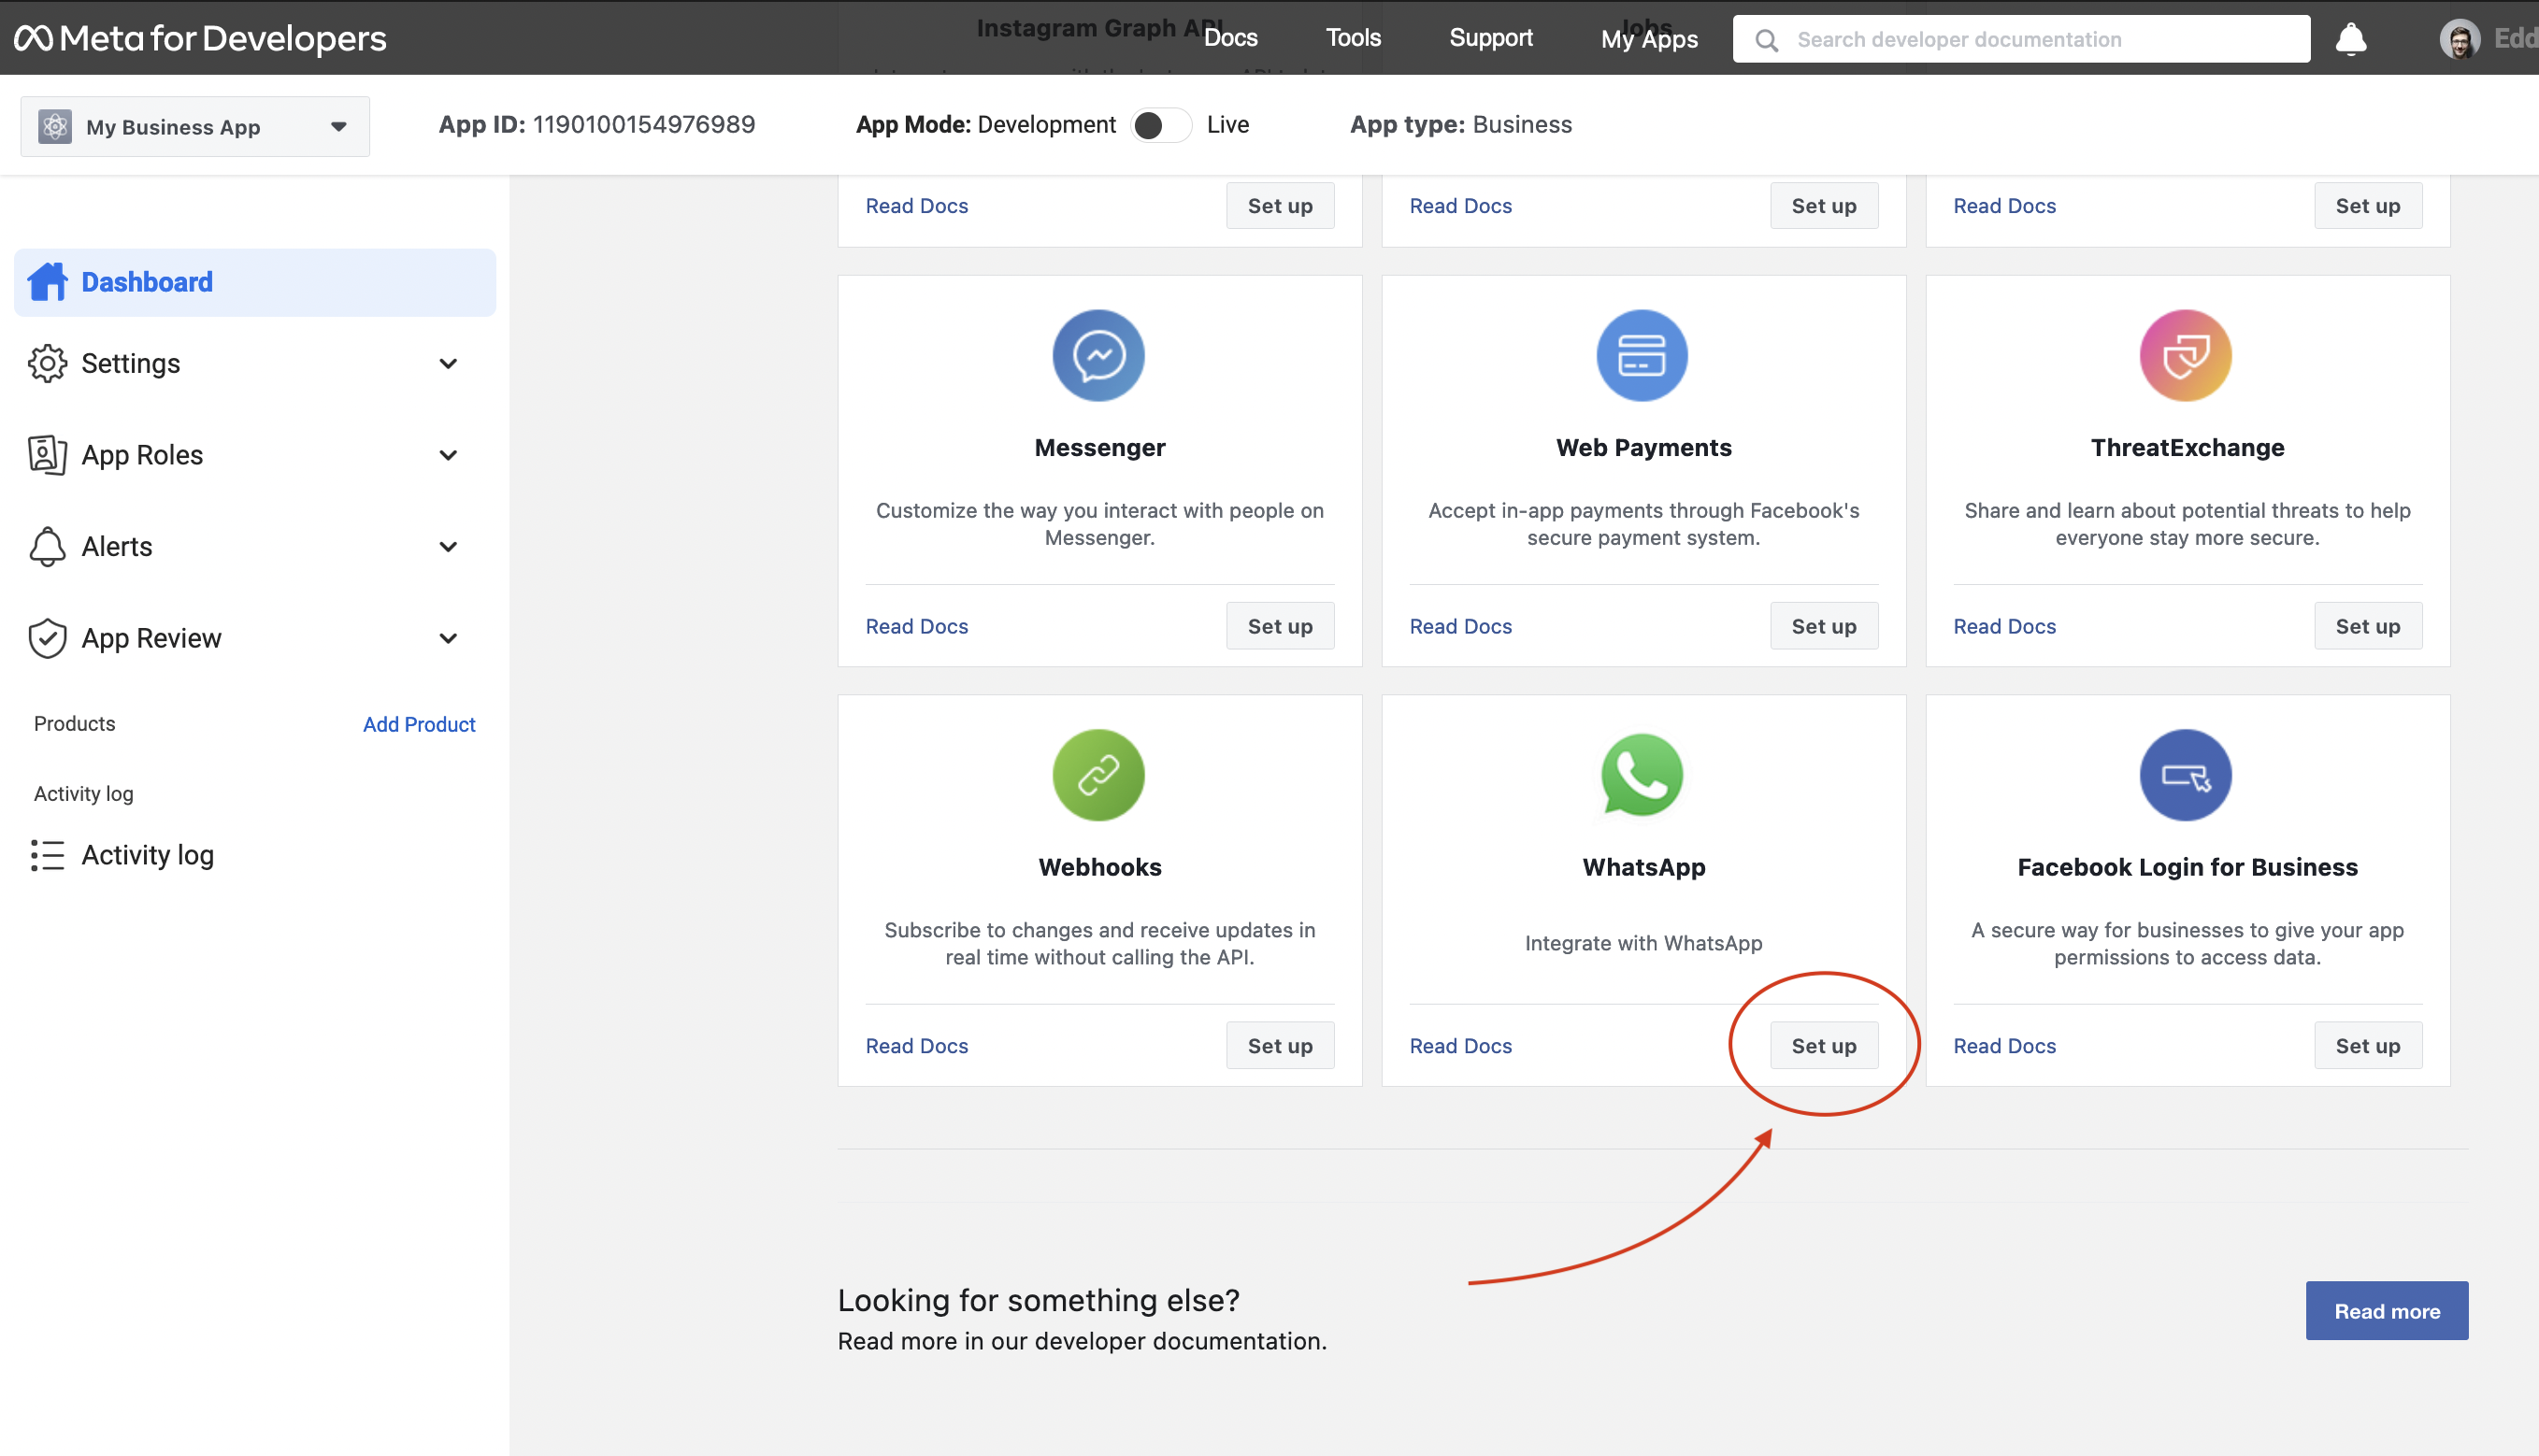
Click Add Product link from the left sidebar. (Small link right under the App Review) You’ll find WhatsApp in the list as explained below; click the Set up button under the WhatsApp box.
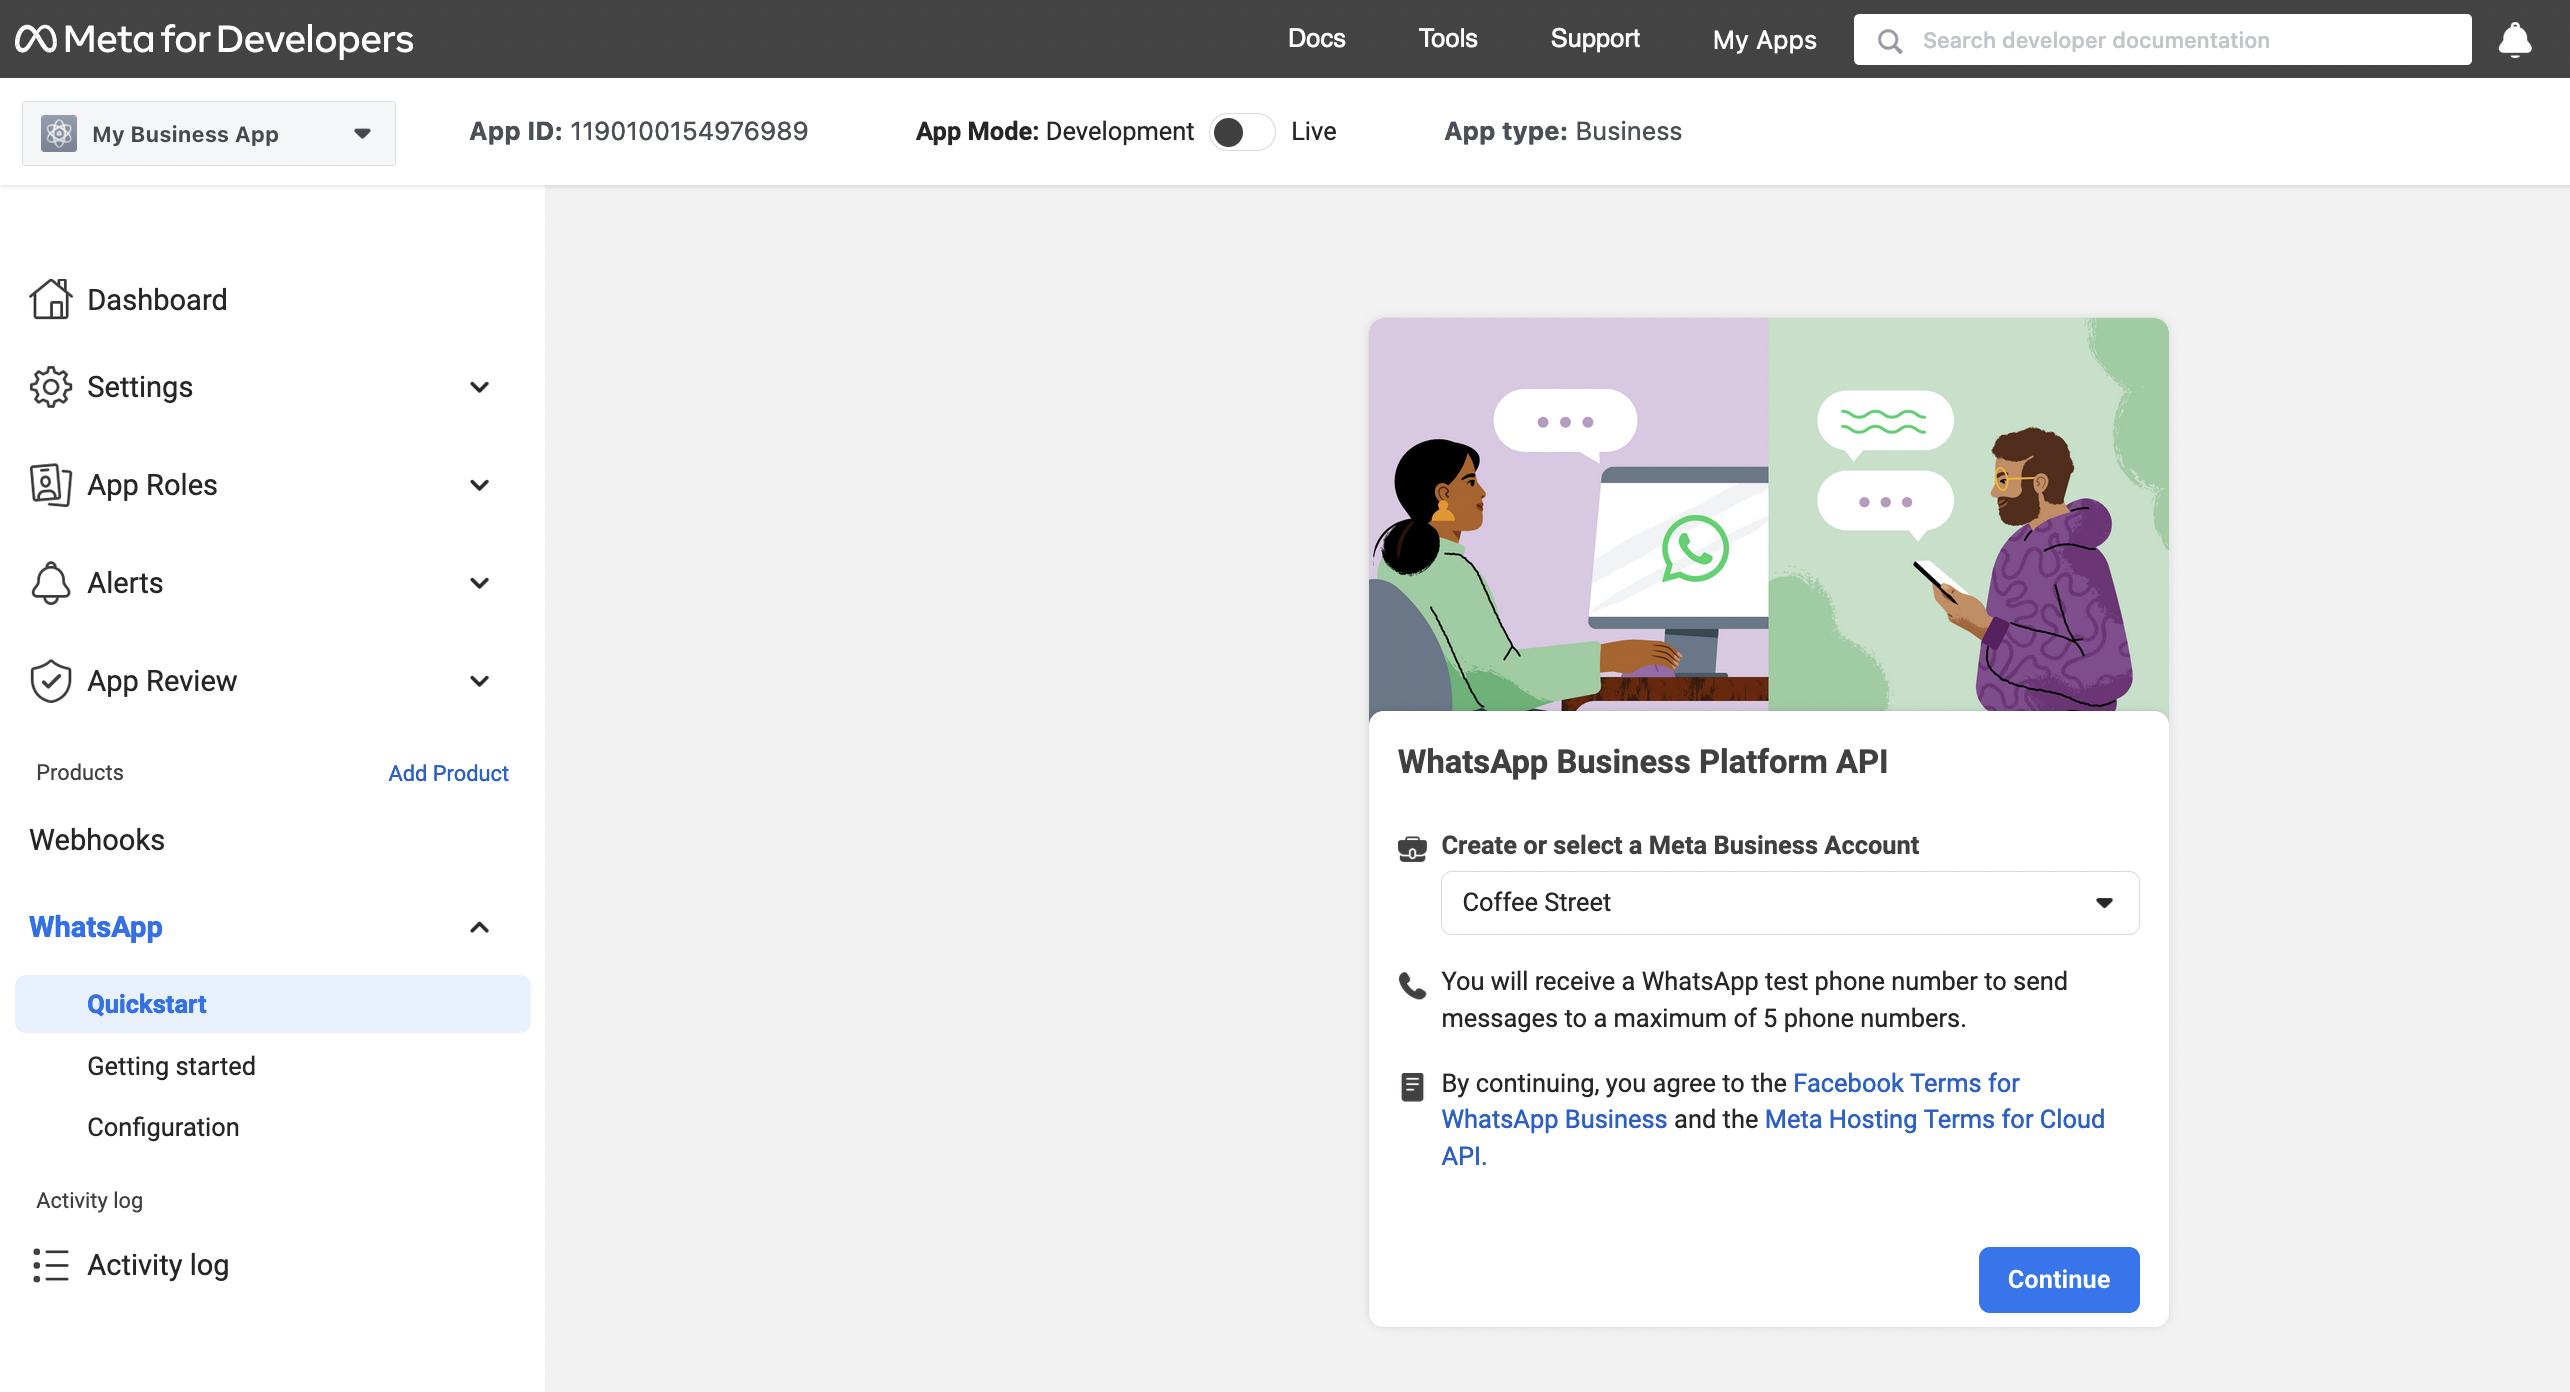
Next page, you’ll need to select your Meta Business Account and click continue. 👇
Step 3 – Add or Create a Phone Number
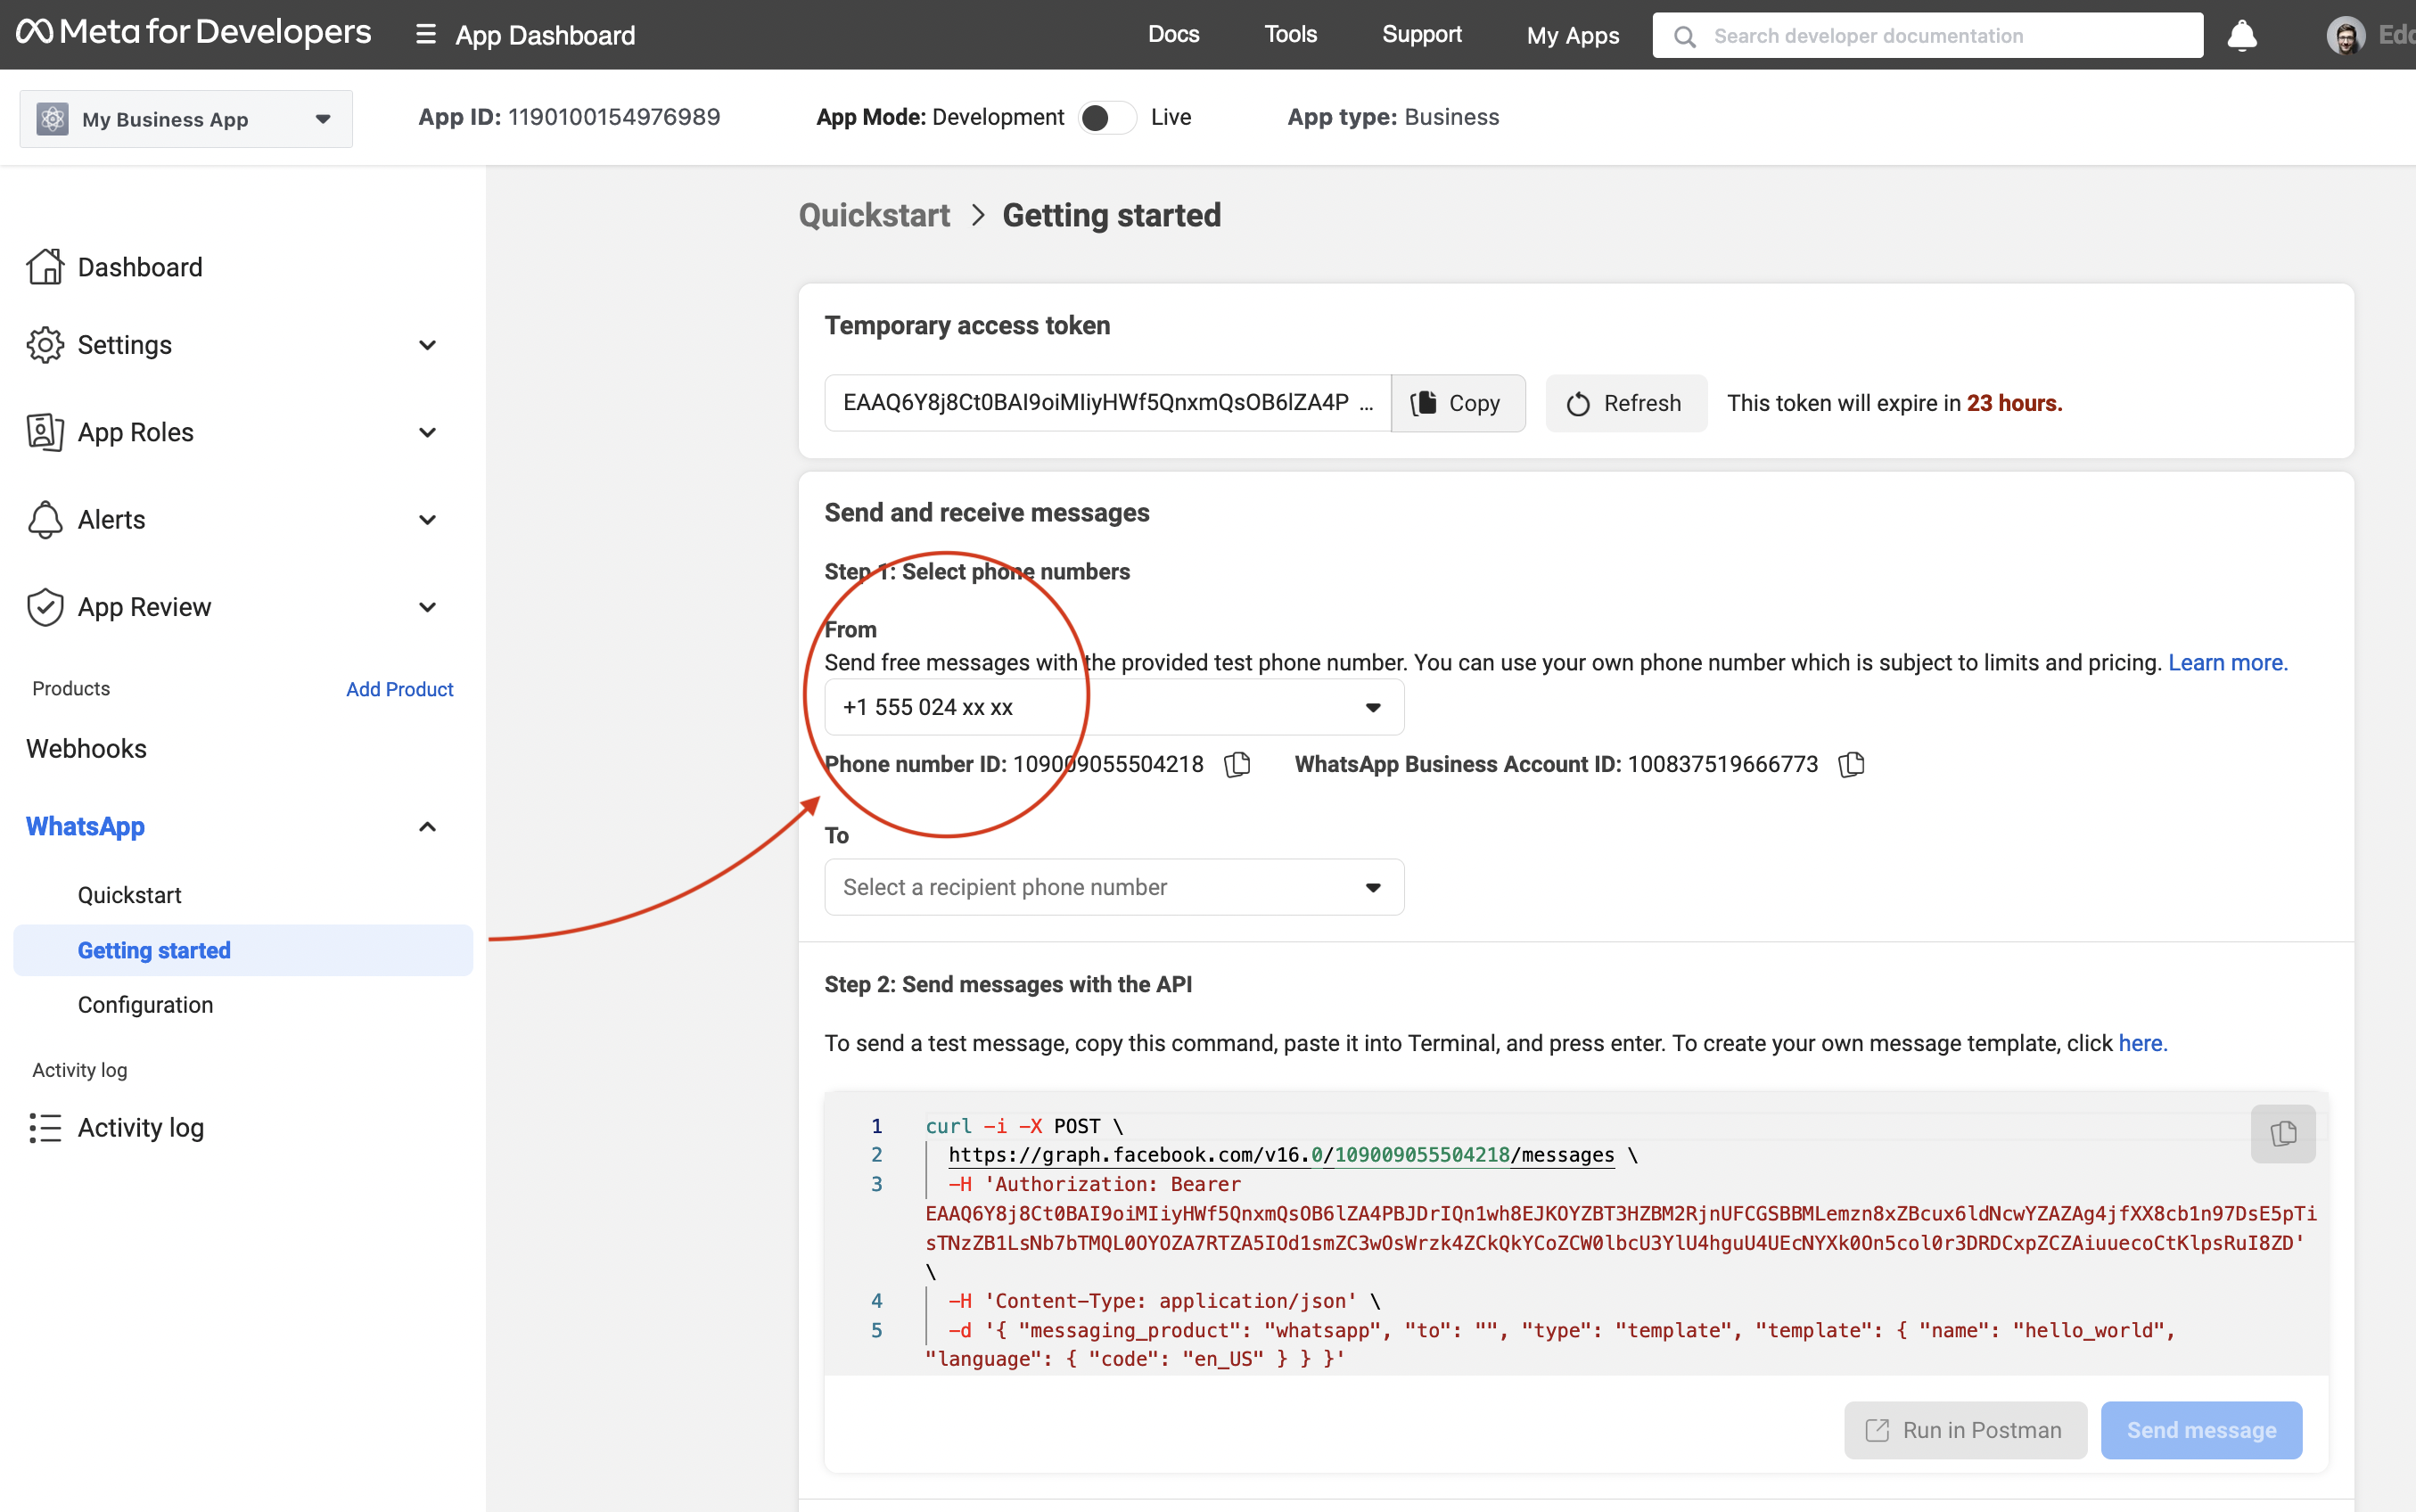
Click Getting Started, which is placed under the WhatsApp menu, and check if your number is already available in the select box.
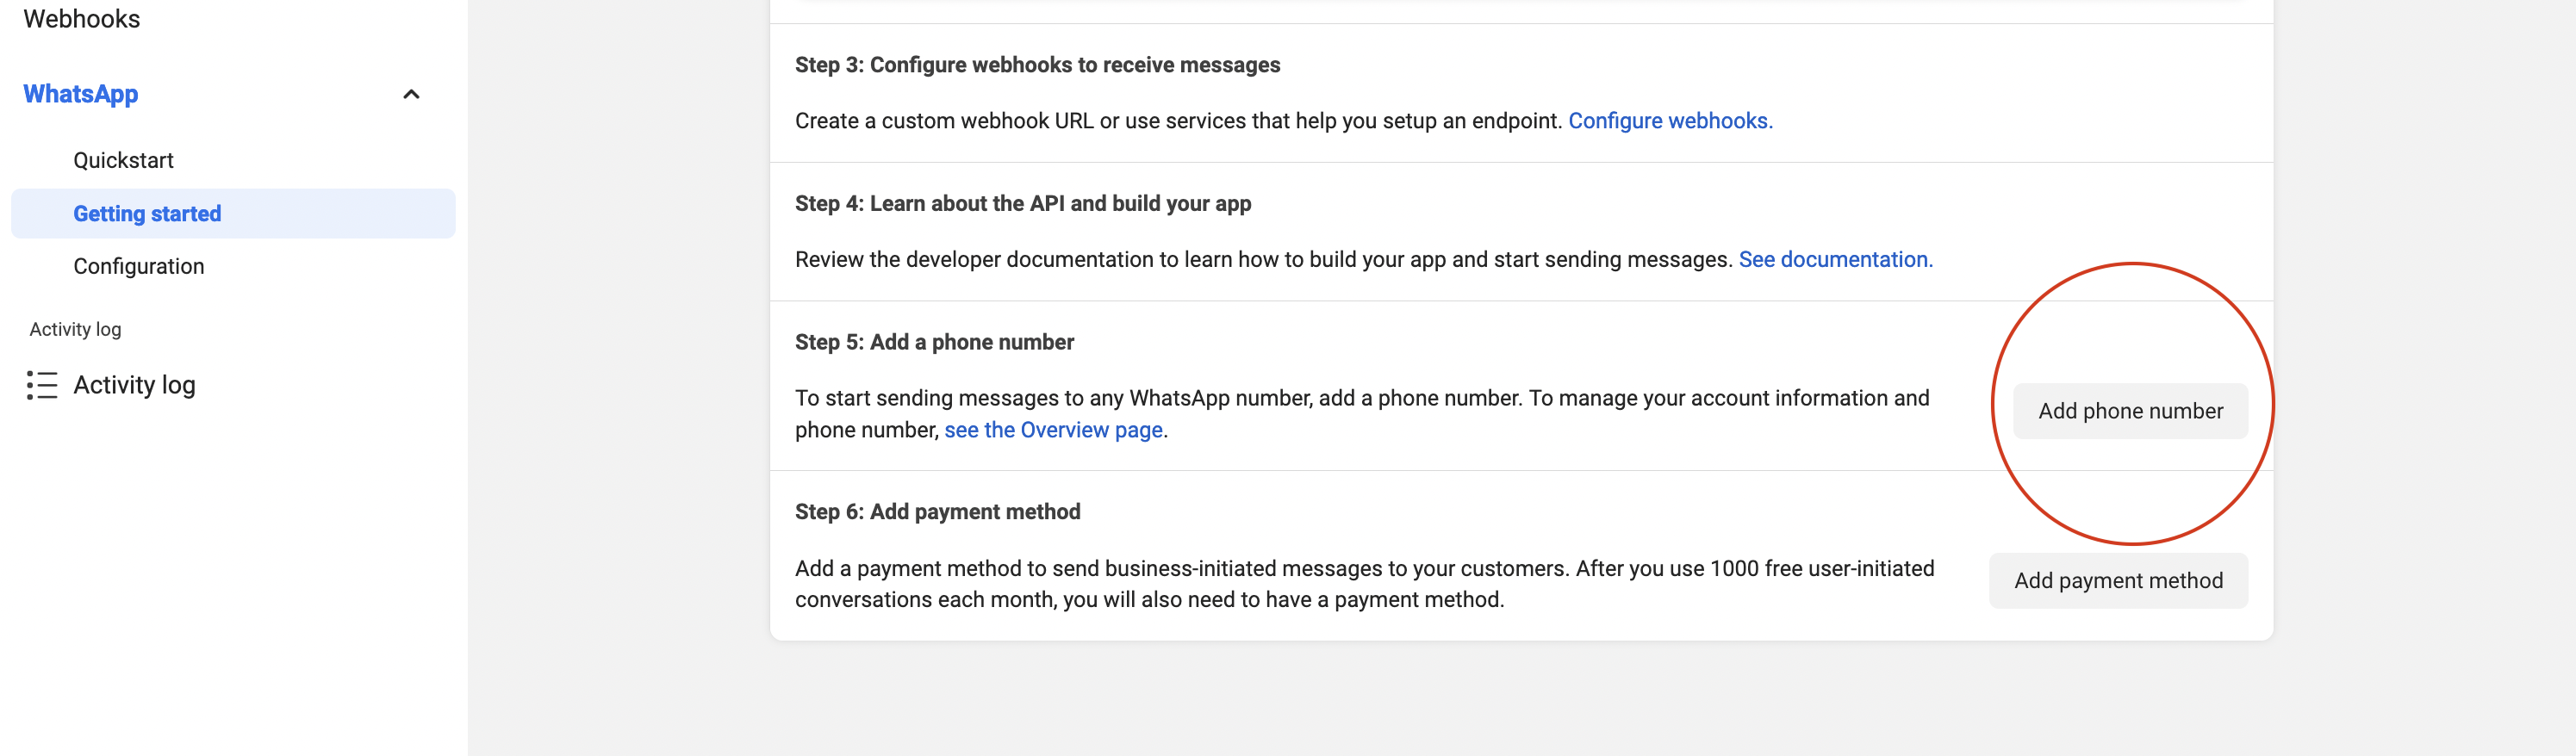
If your main business number is not available in the list, then slightly scroll down, and you’ll need to click Add phone number button explained below;
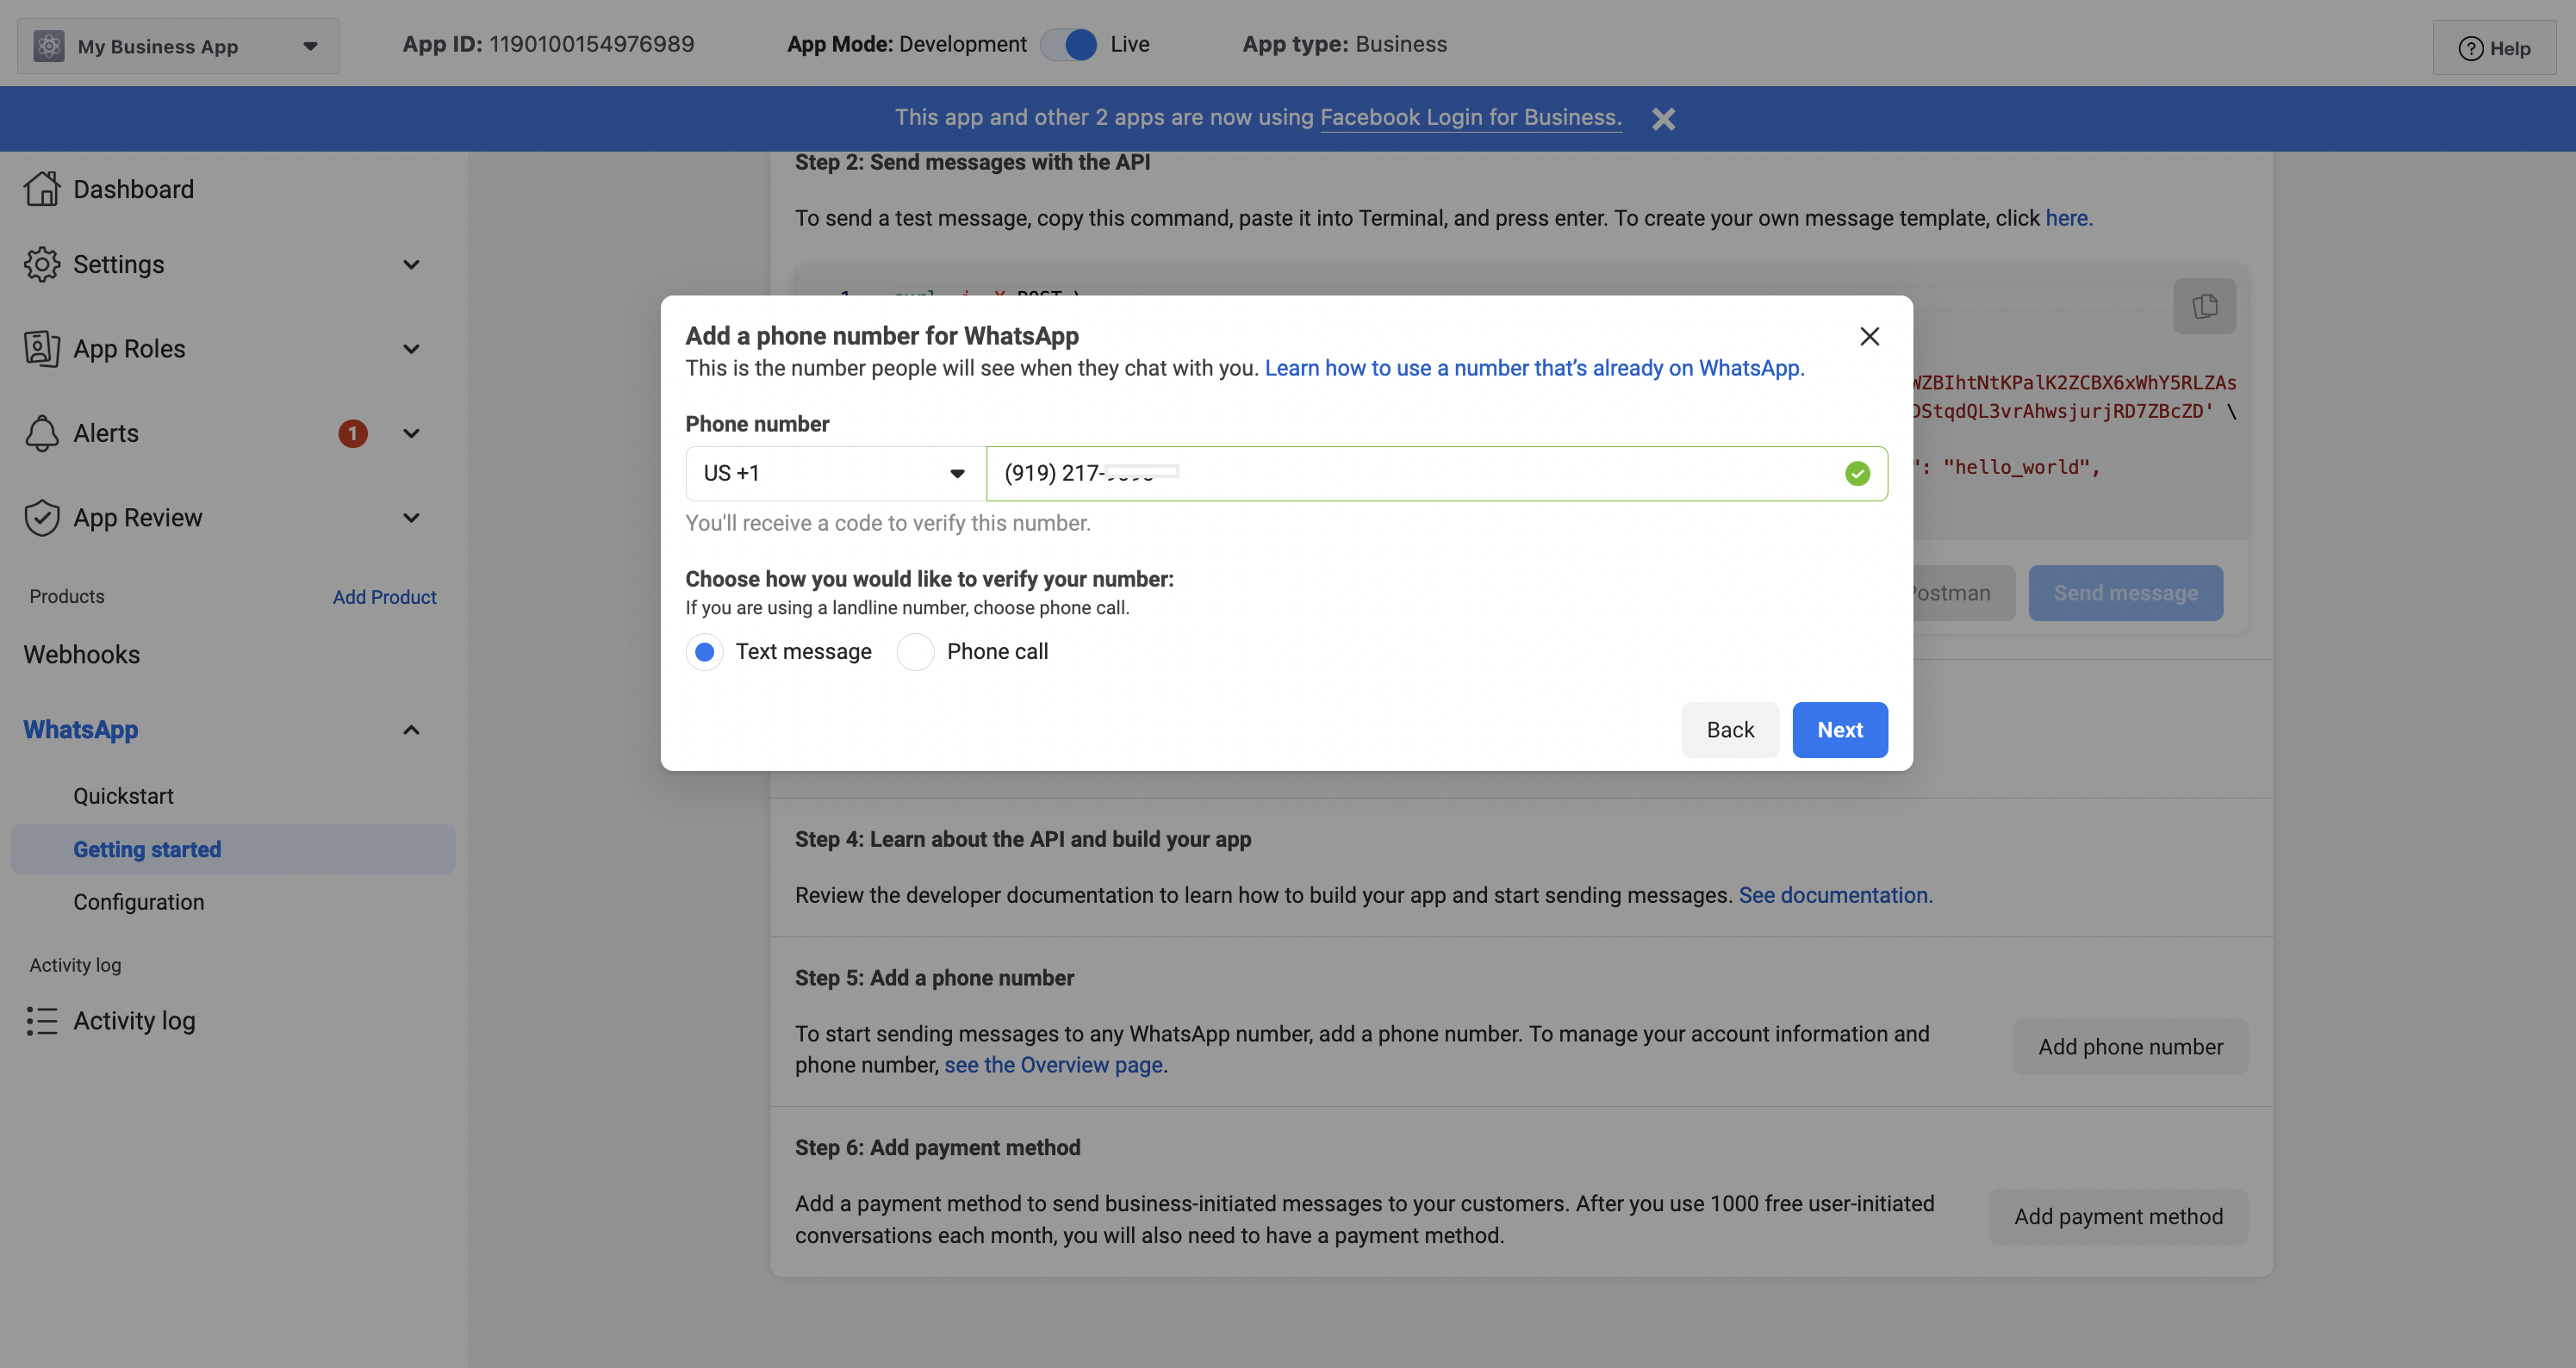
When the button is clicked, you’ll need to fill out the form;
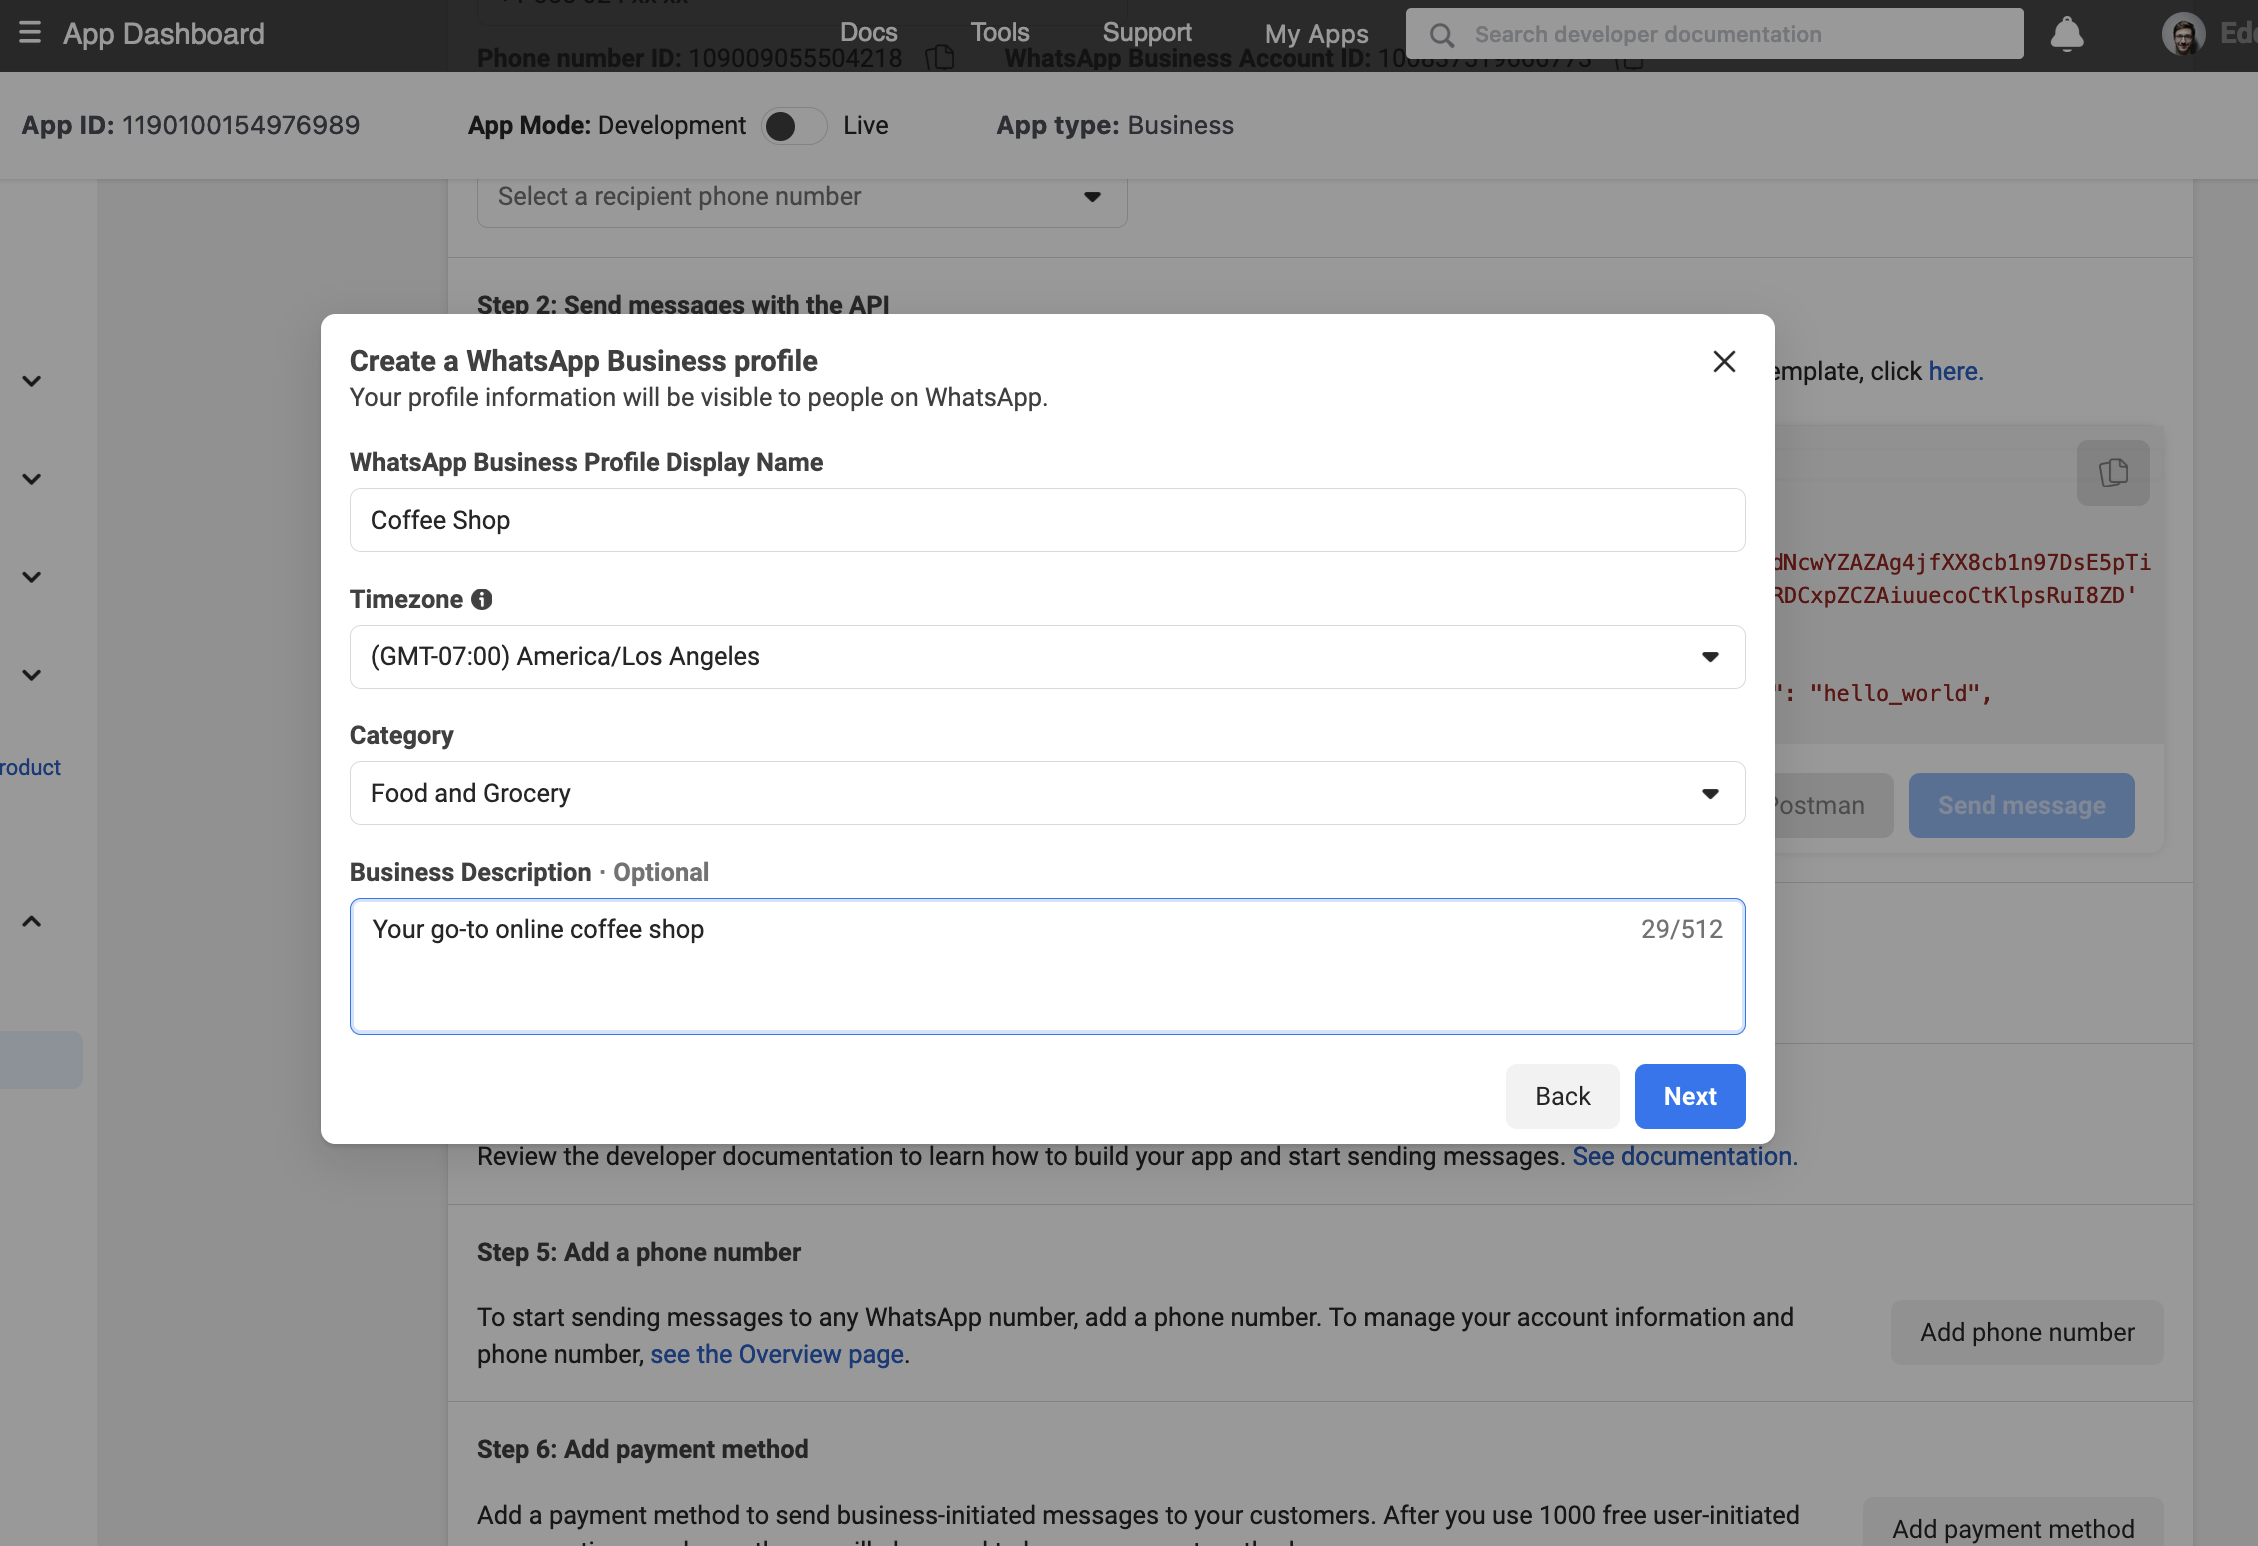
This section will reflect on your visitor’s WhatsApp messaging screen. You can always edit WhatsApp display information later on so quickly type and click Next.
Lastly, Type your phone number and verify by text message or Phone Call.
Now your number is attached to your Application and is also associated with your meta business successfully. Now you can see your main number in the select box.
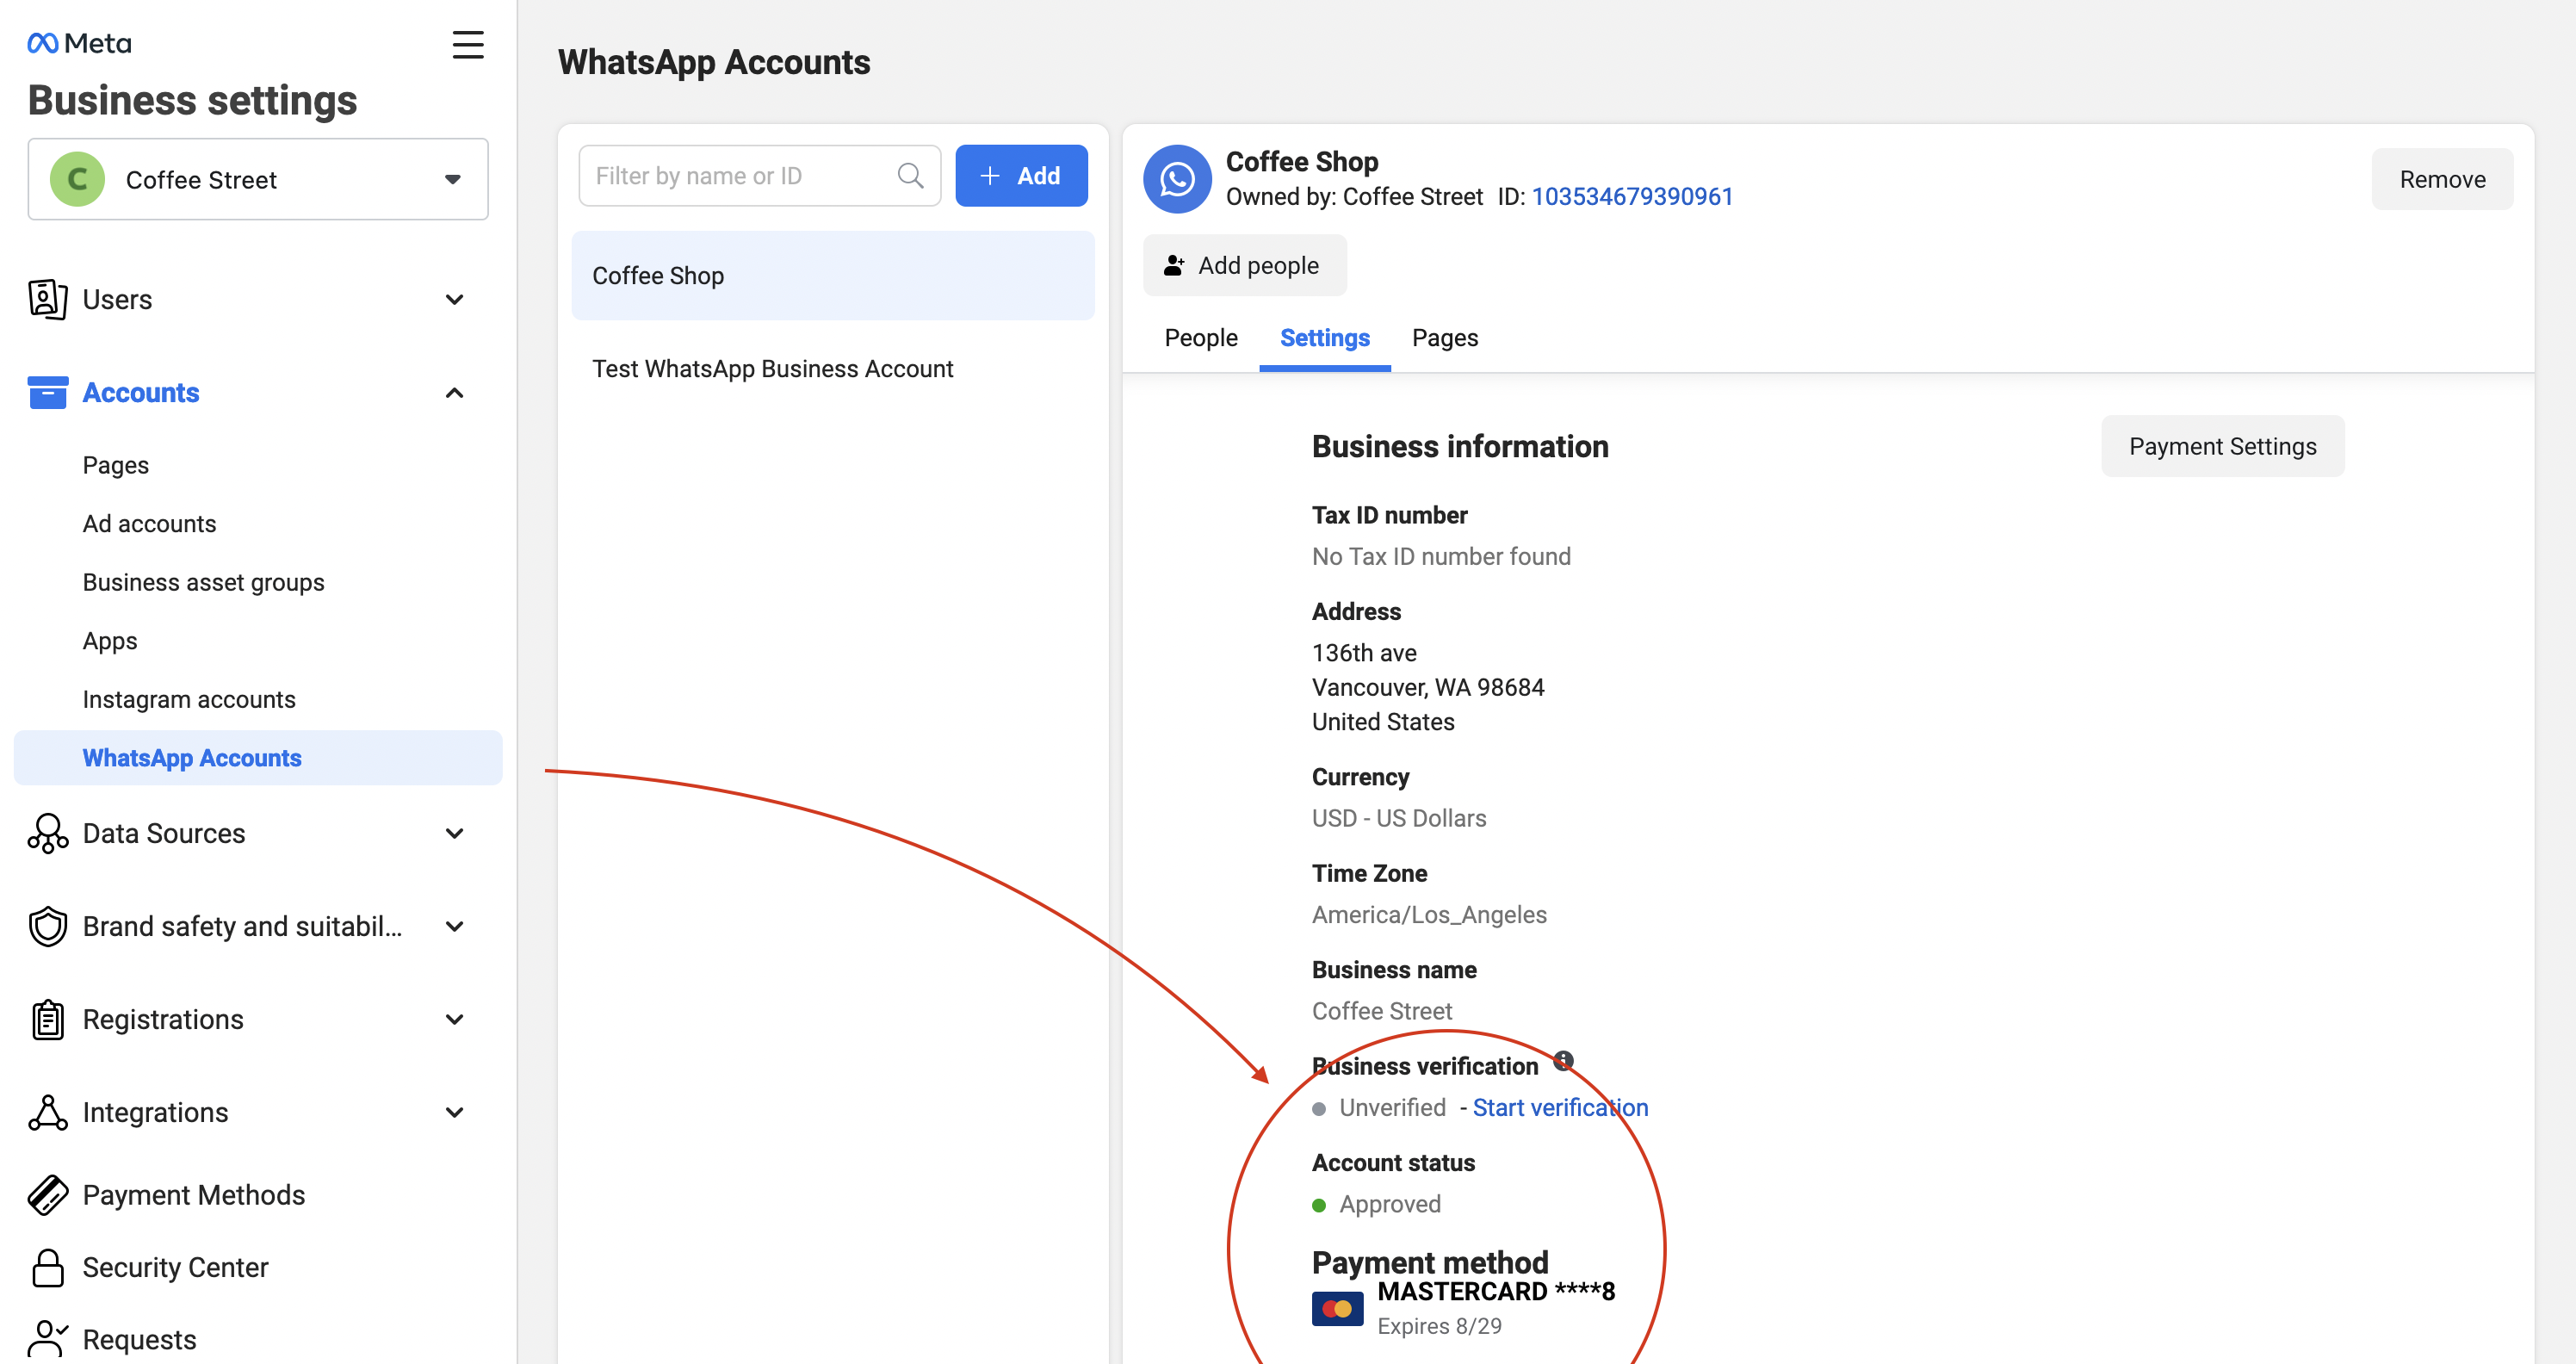
3.2 Check Payment Method
On this Getting Started Page, there is also an Add Payment method button. The button is right under the Add phone number button. Even if your Meta Business has a payment method, click that button and make sure that your payment method is visibly similar to the image below;
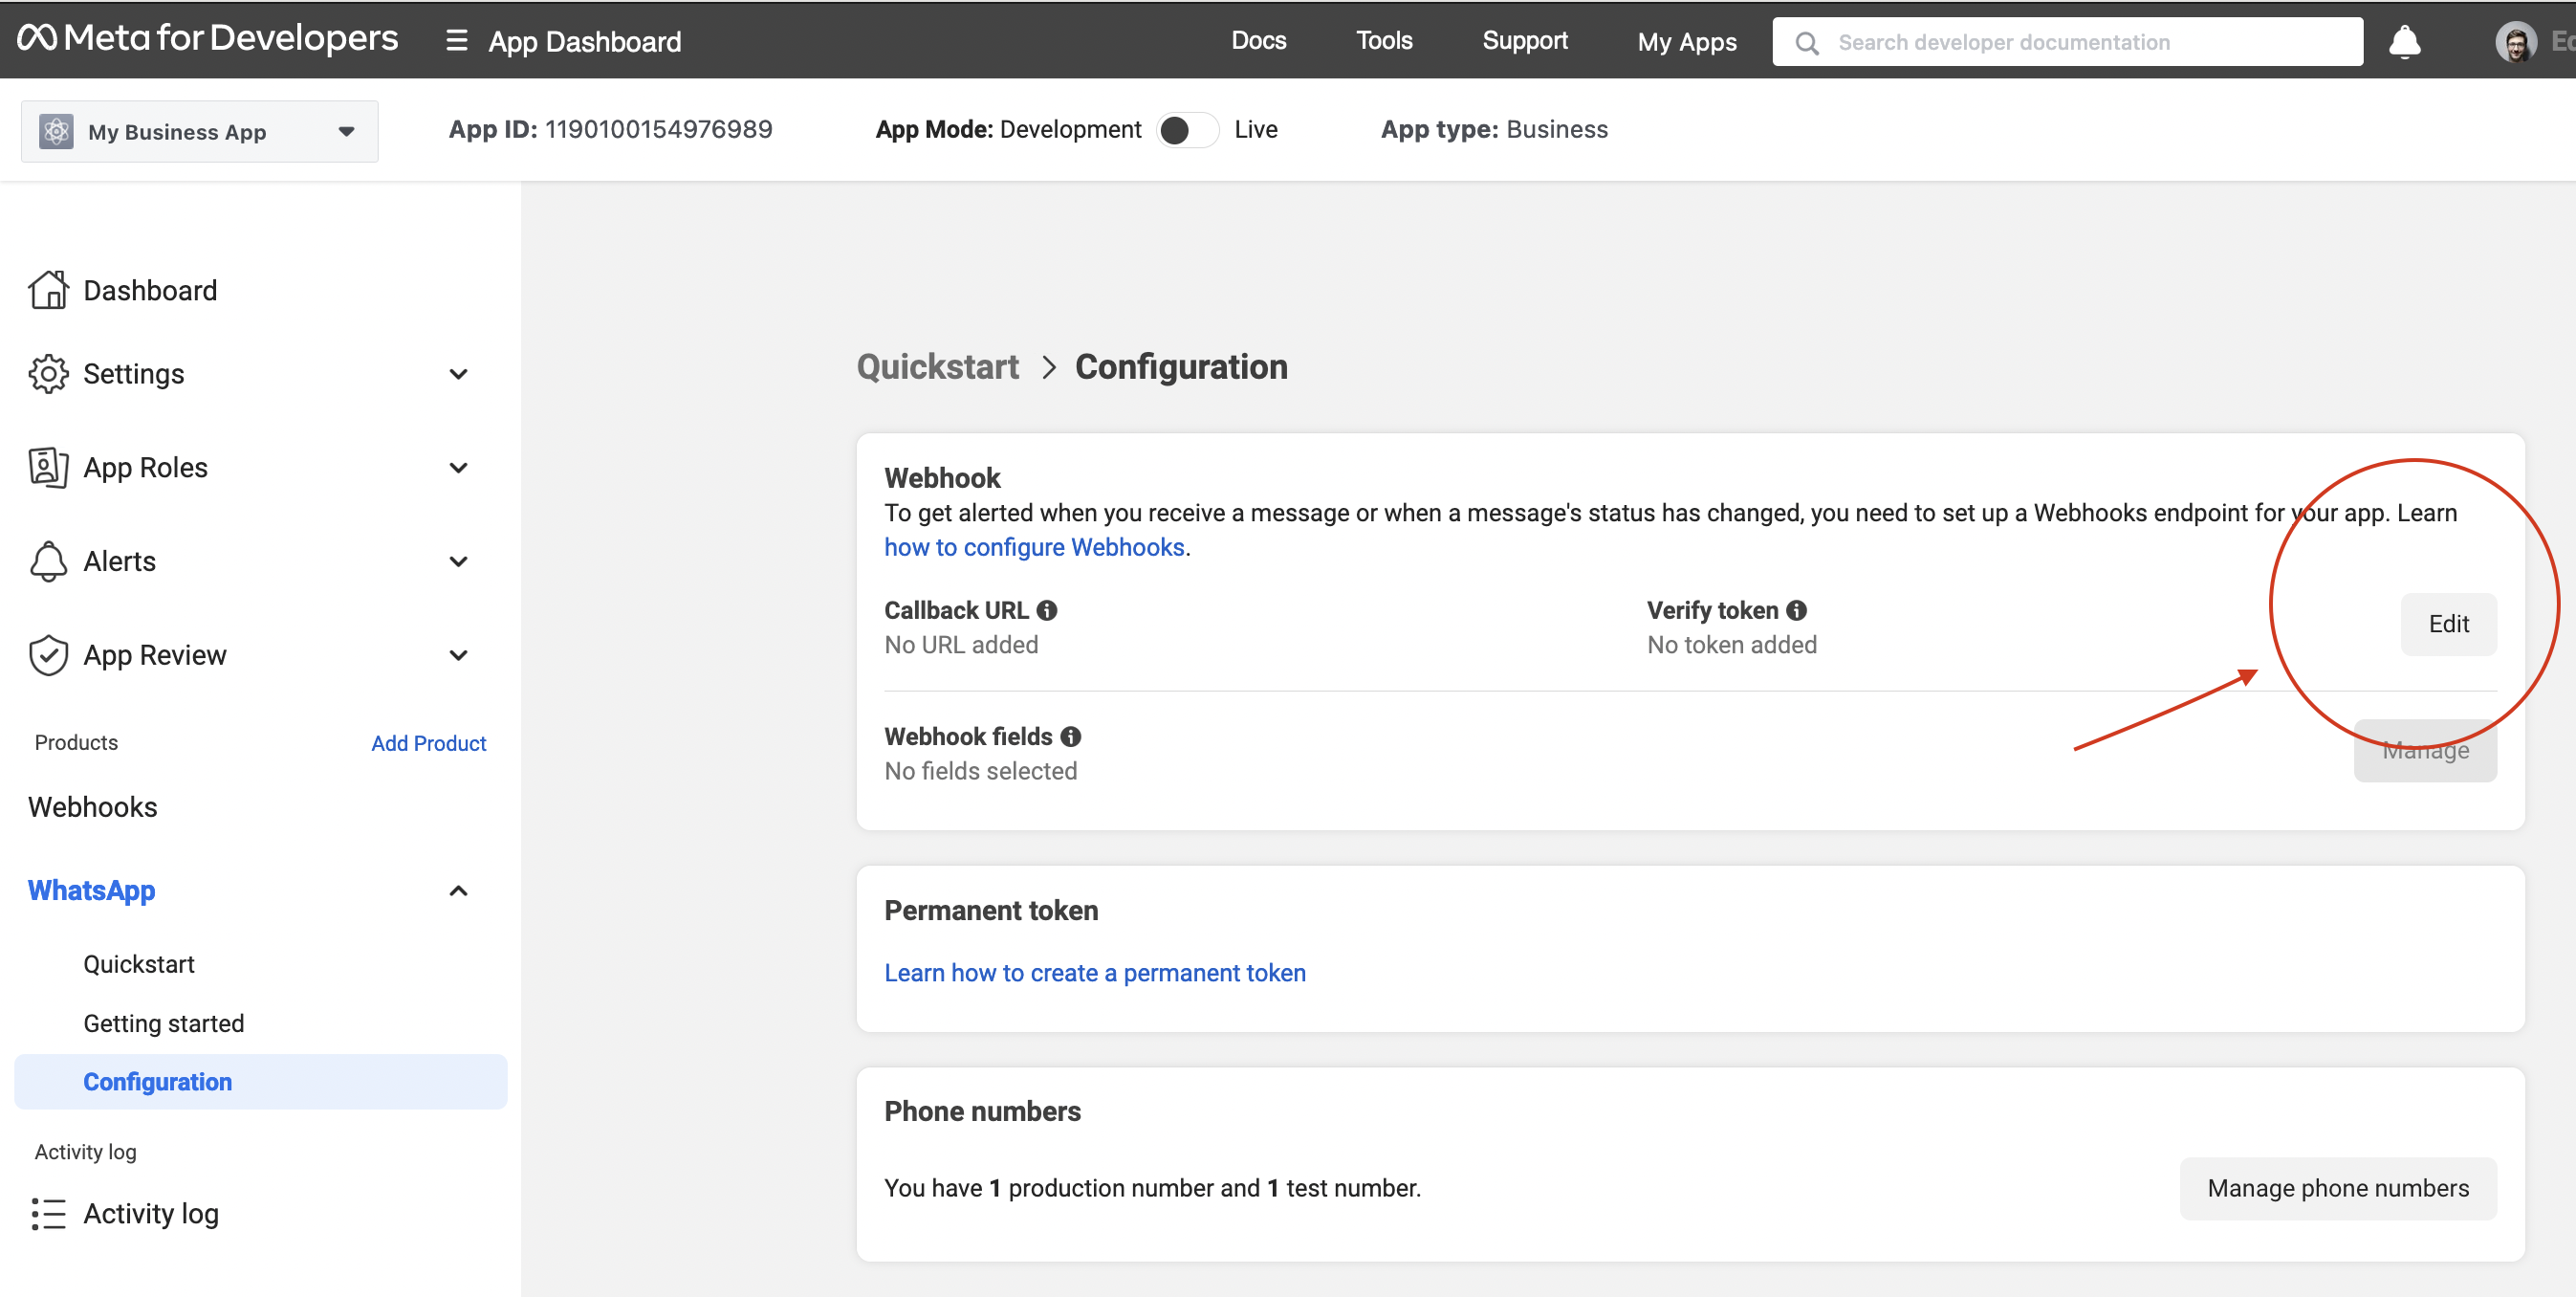
Step 4 – Technical Configuration
Click Configuration from the menu, and you’ll land in the Webhook edit section. Click the Edit button.
In this section, type the information below into the form;
Callback URL
https://api.juphy.com/whatsapp/messages.listenVerify token
e3cg2ZvgtoAnd it will look like the image below;
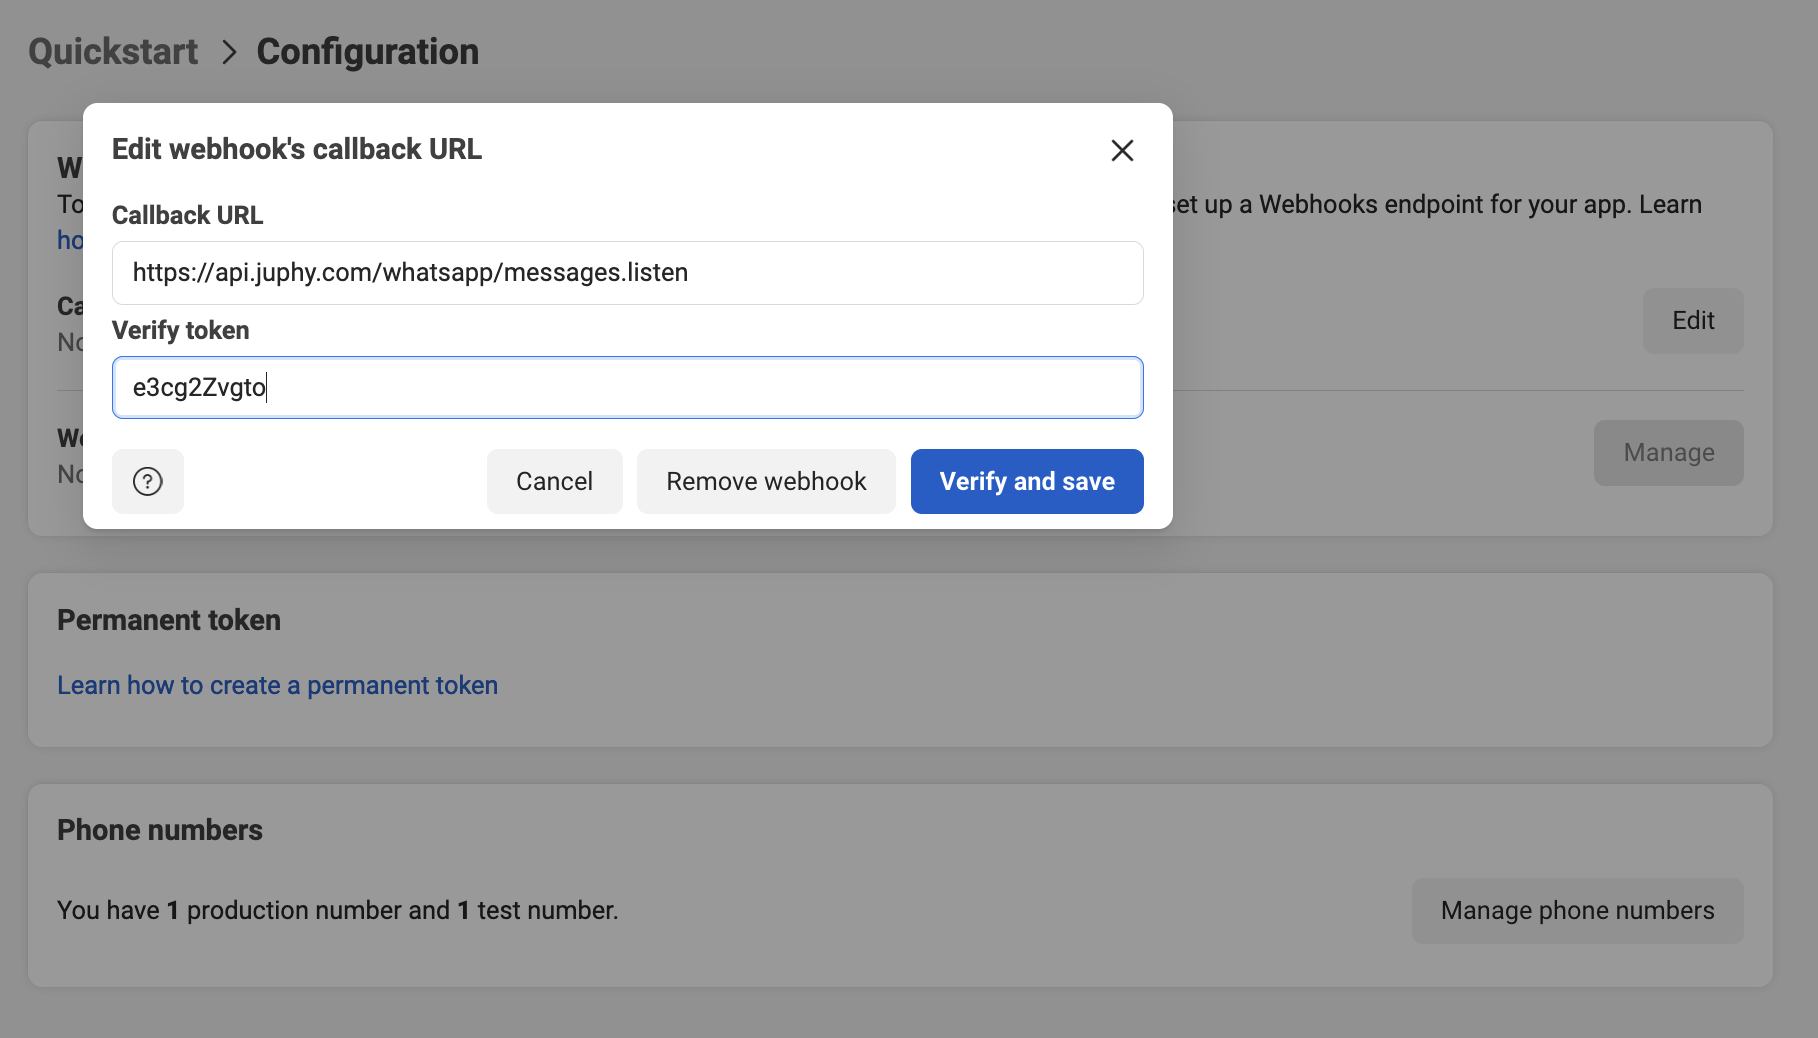
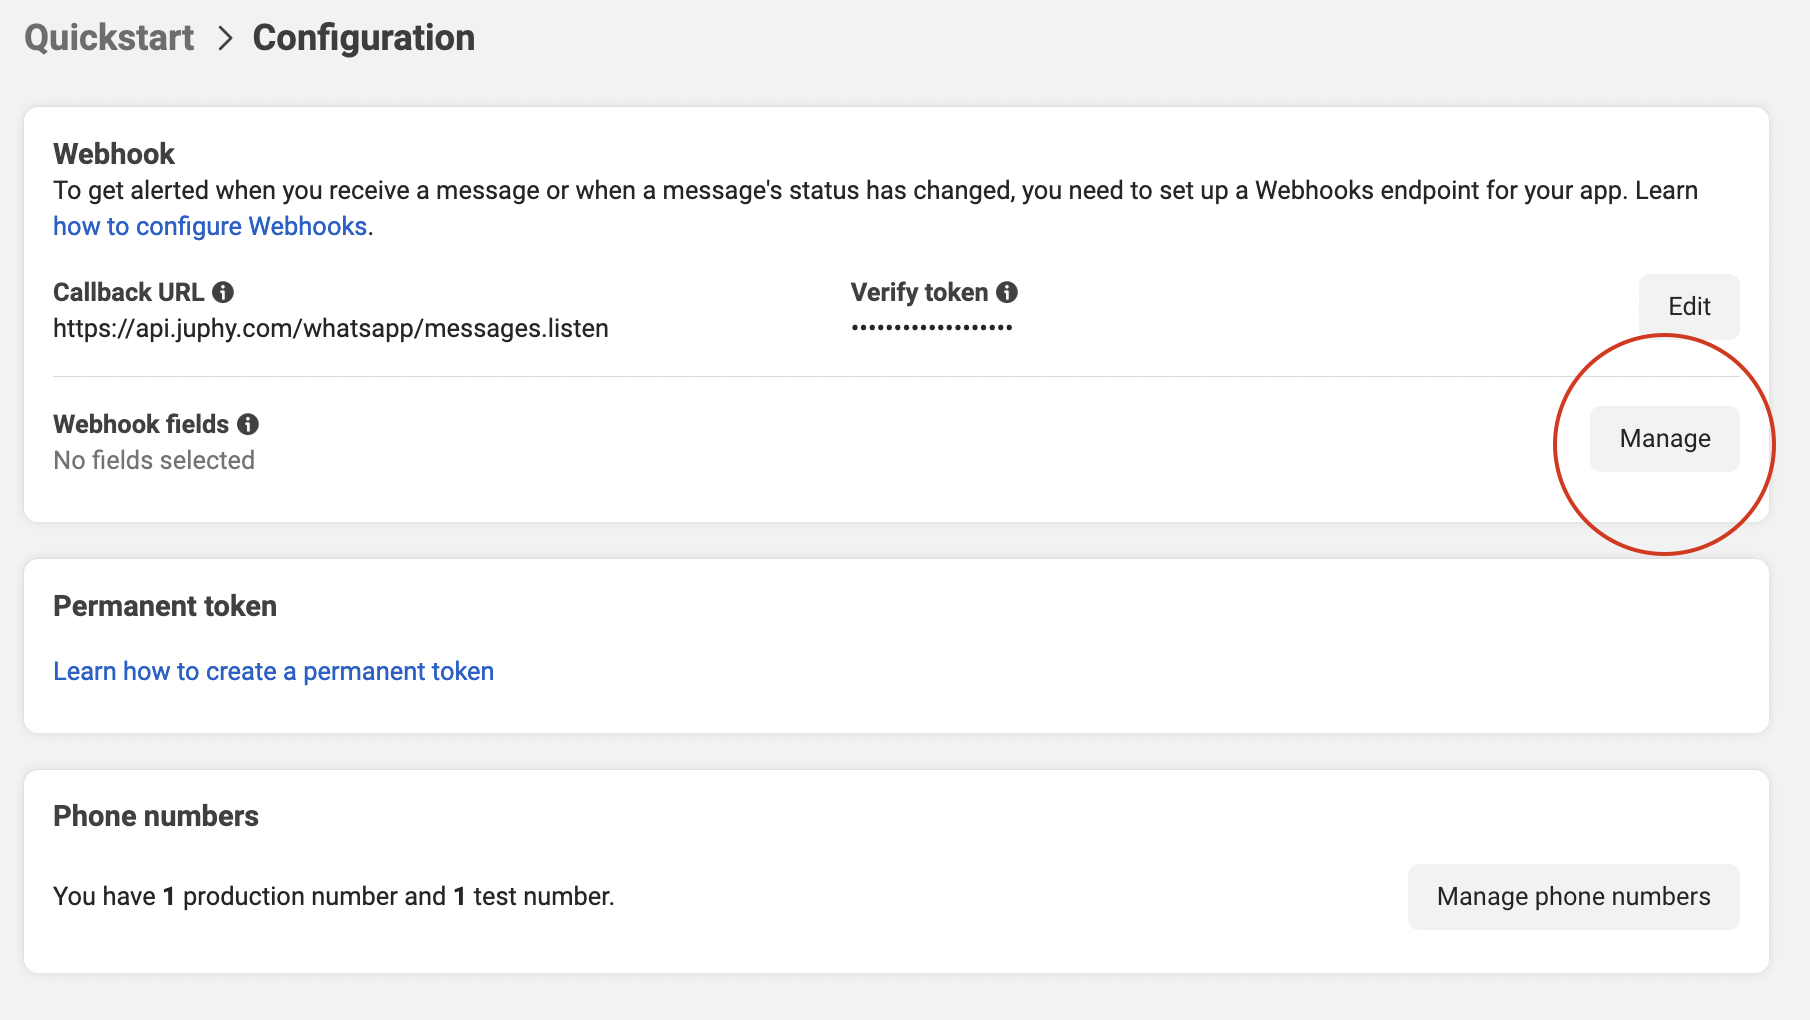
Click Verify and save. The next step is simple, quickly click the Manage button;
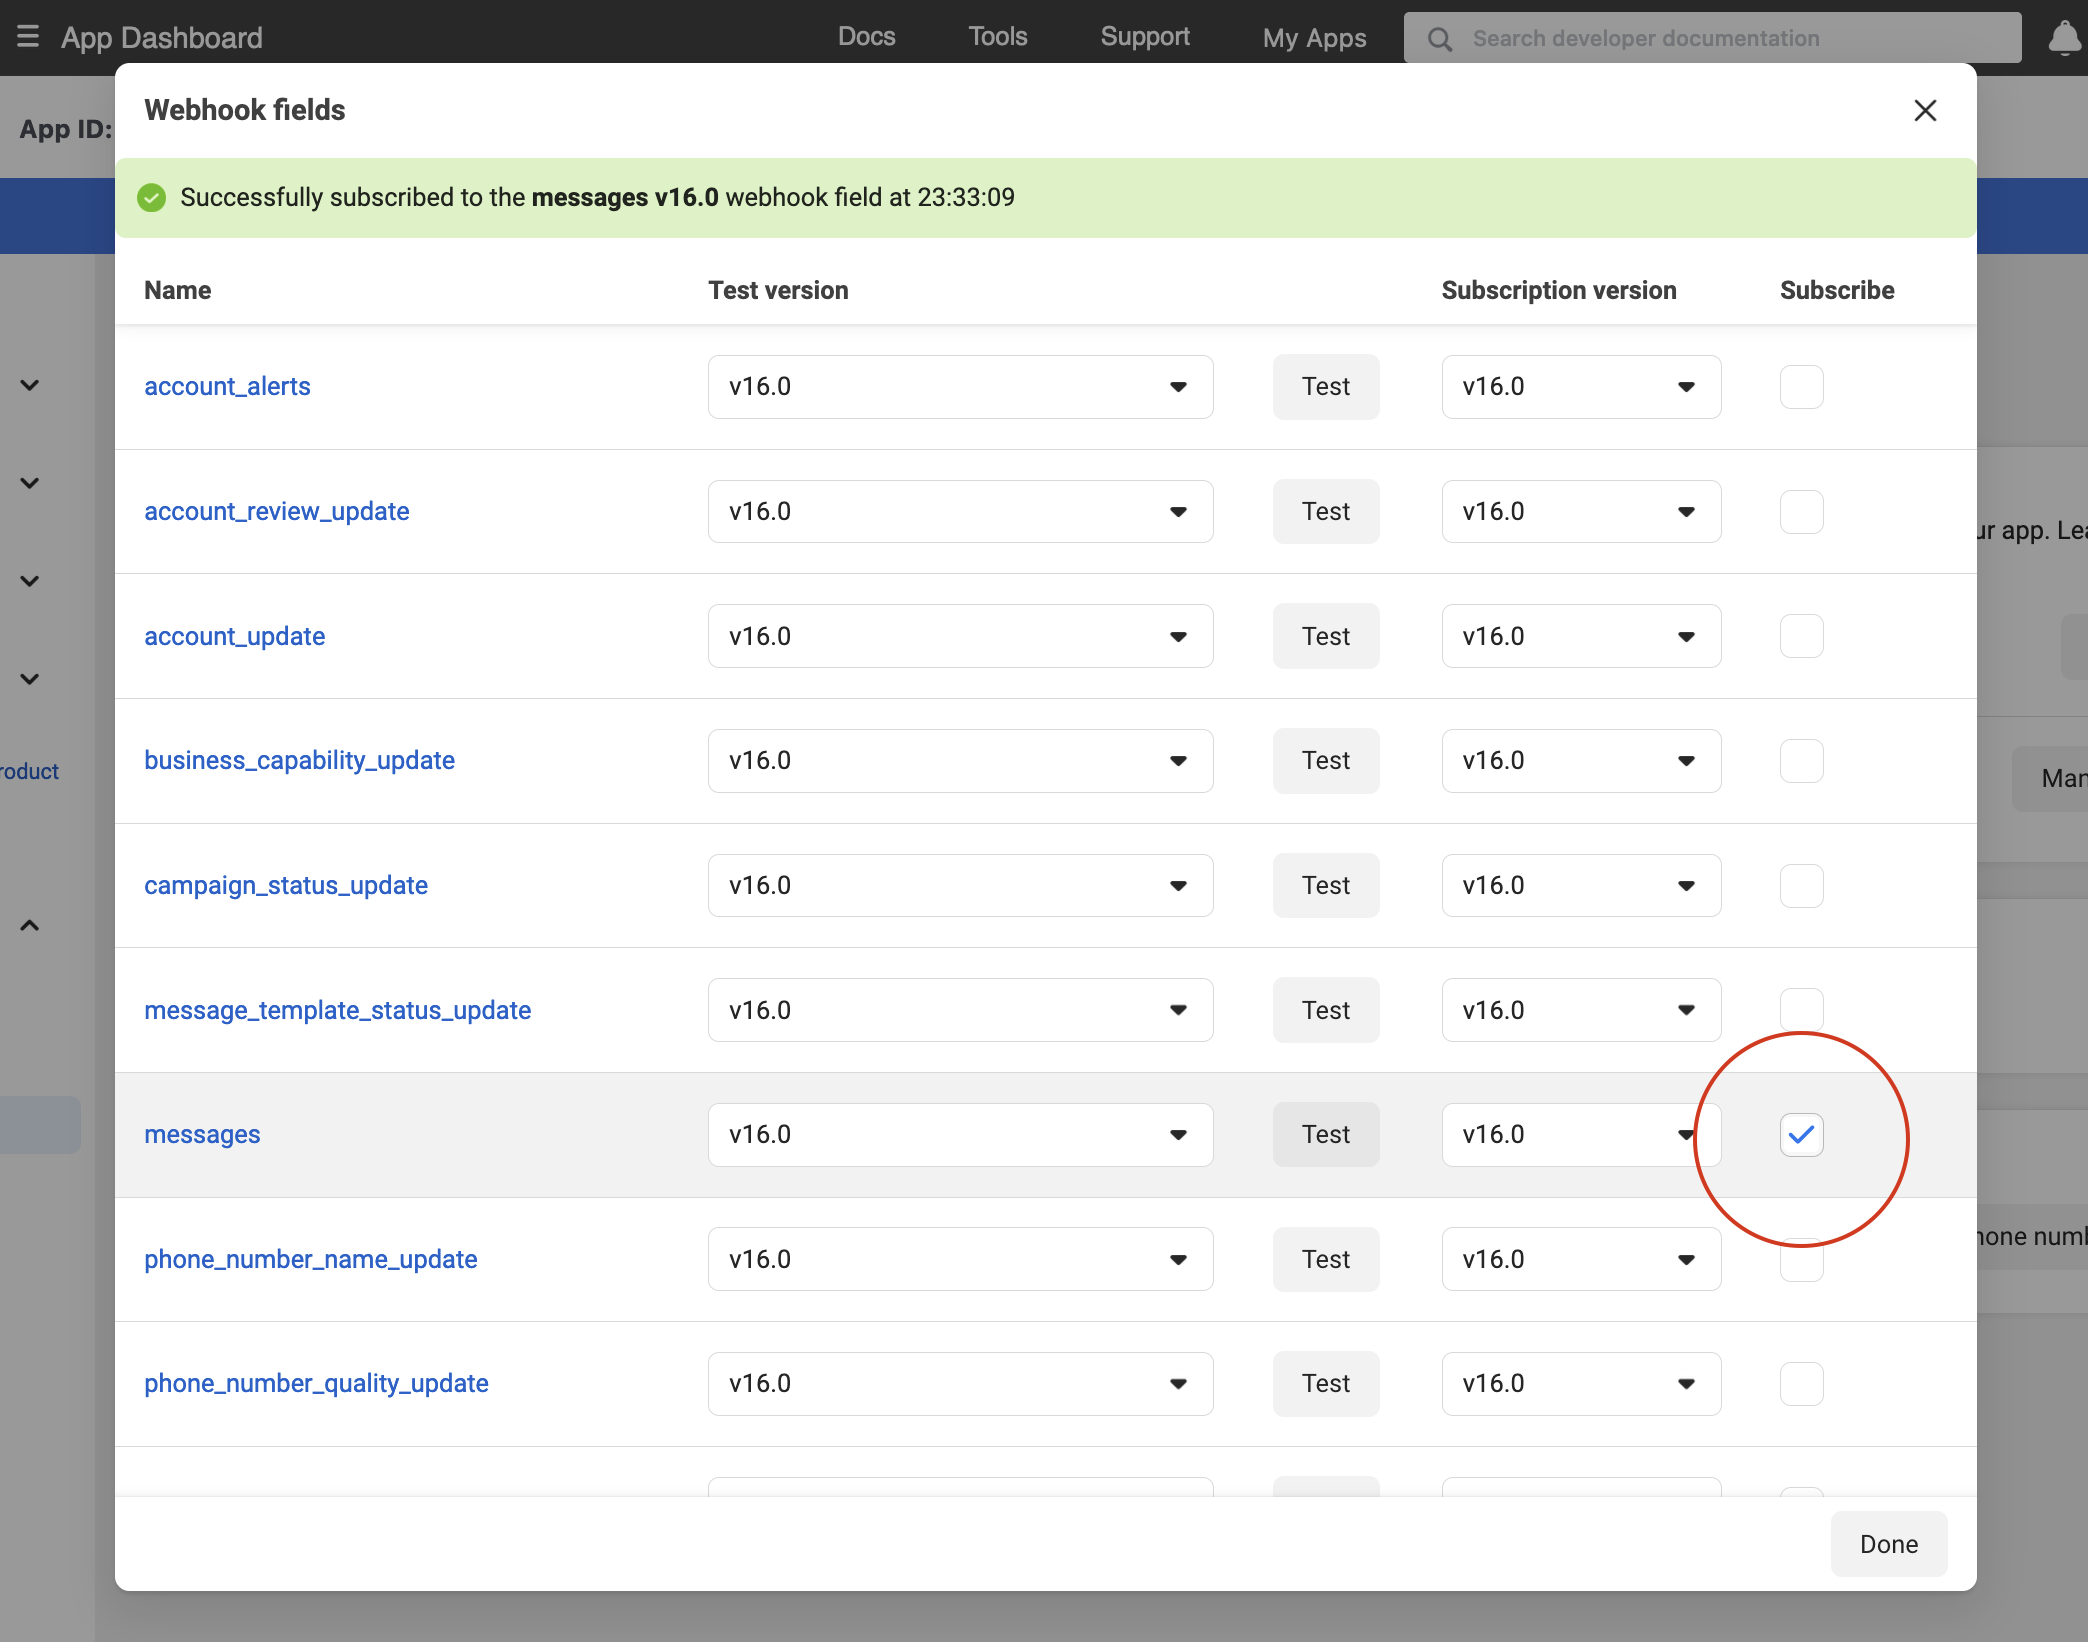
And subscribe to the messages field from the list explained screenshot below, and click Done to save changes.
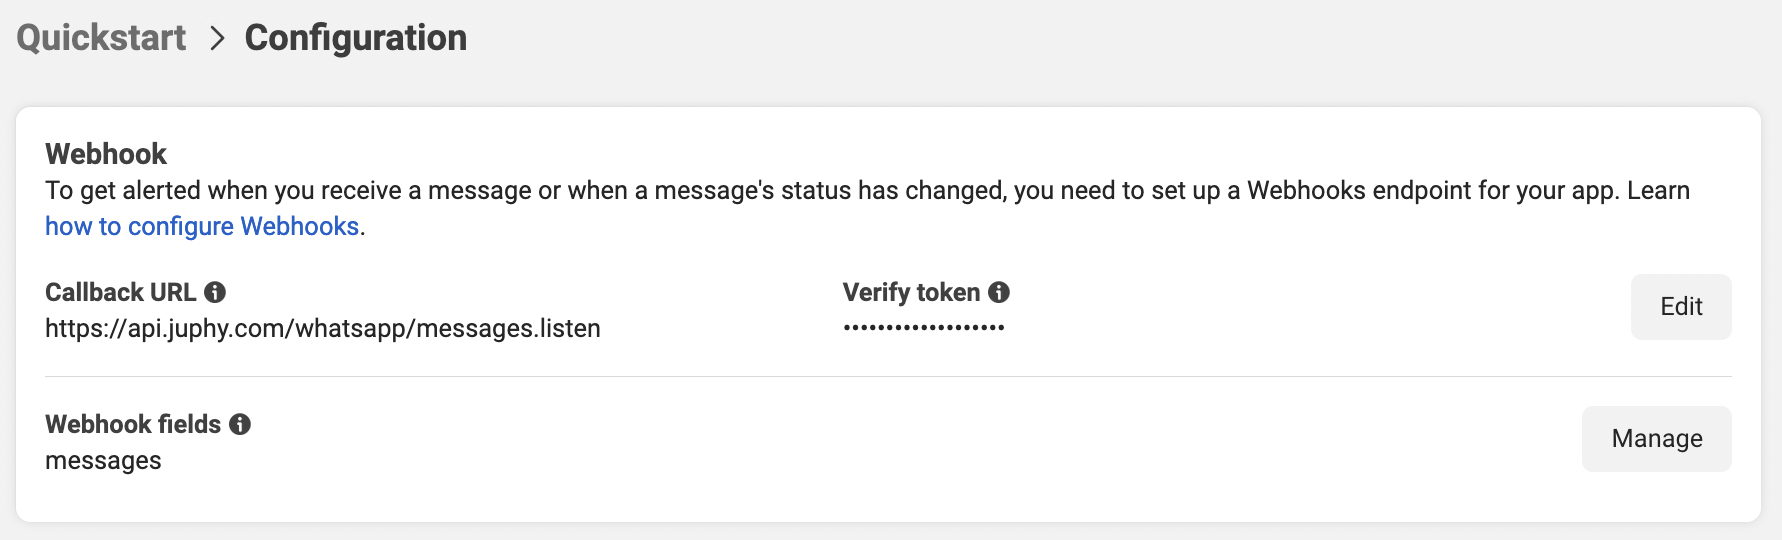
Your configuration page will look like this when all required steps are completed successfully.
Last Step – Basic settings and Live Mode Activation
You must add Juphy’s privacy URL to your app settings. To do that, go to Settings -> Basic and type the privacy URL like explained below, and Save changes.
https://juphy.com/privacy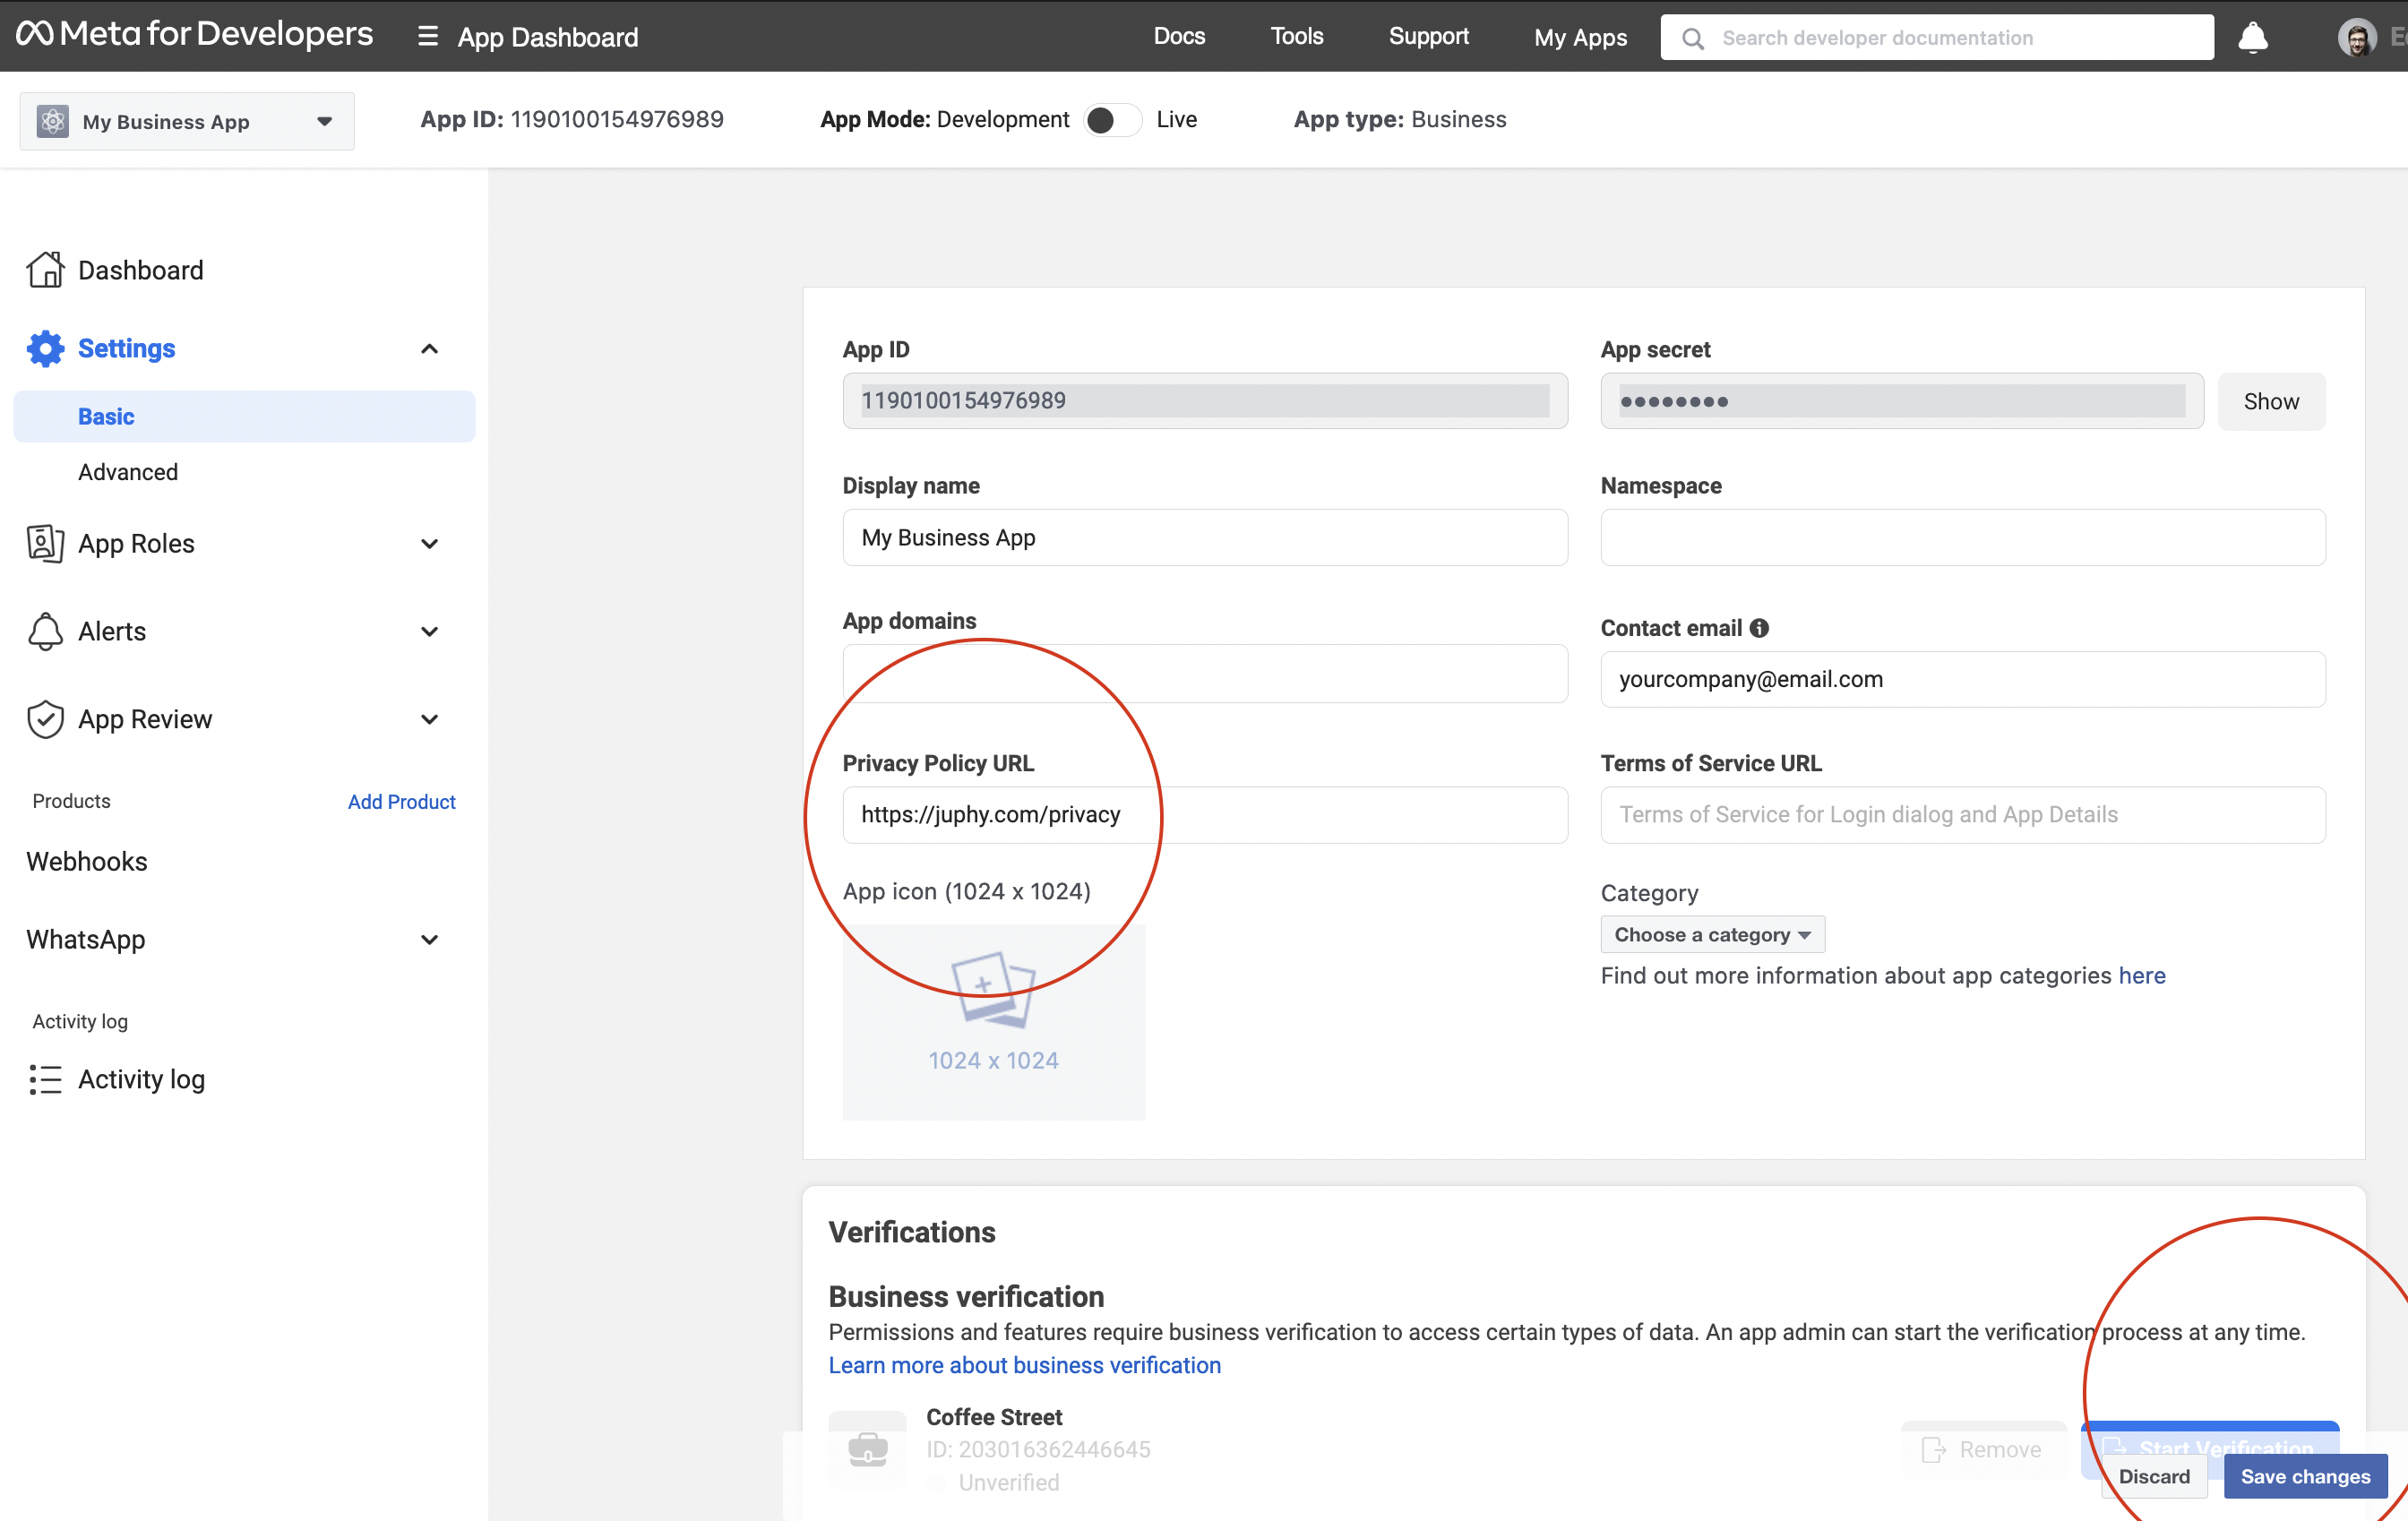
Lastly, activate your app from the top of the page; your app must be Live like the image below;

Great! 🎉 Now you’re ready to connect your Phone number to Juphy, and you’ll see WhatsApp Messages in Juphy’s inbox, or you can start WhatsApp bulk messaging from Juphy’s Campaign section.
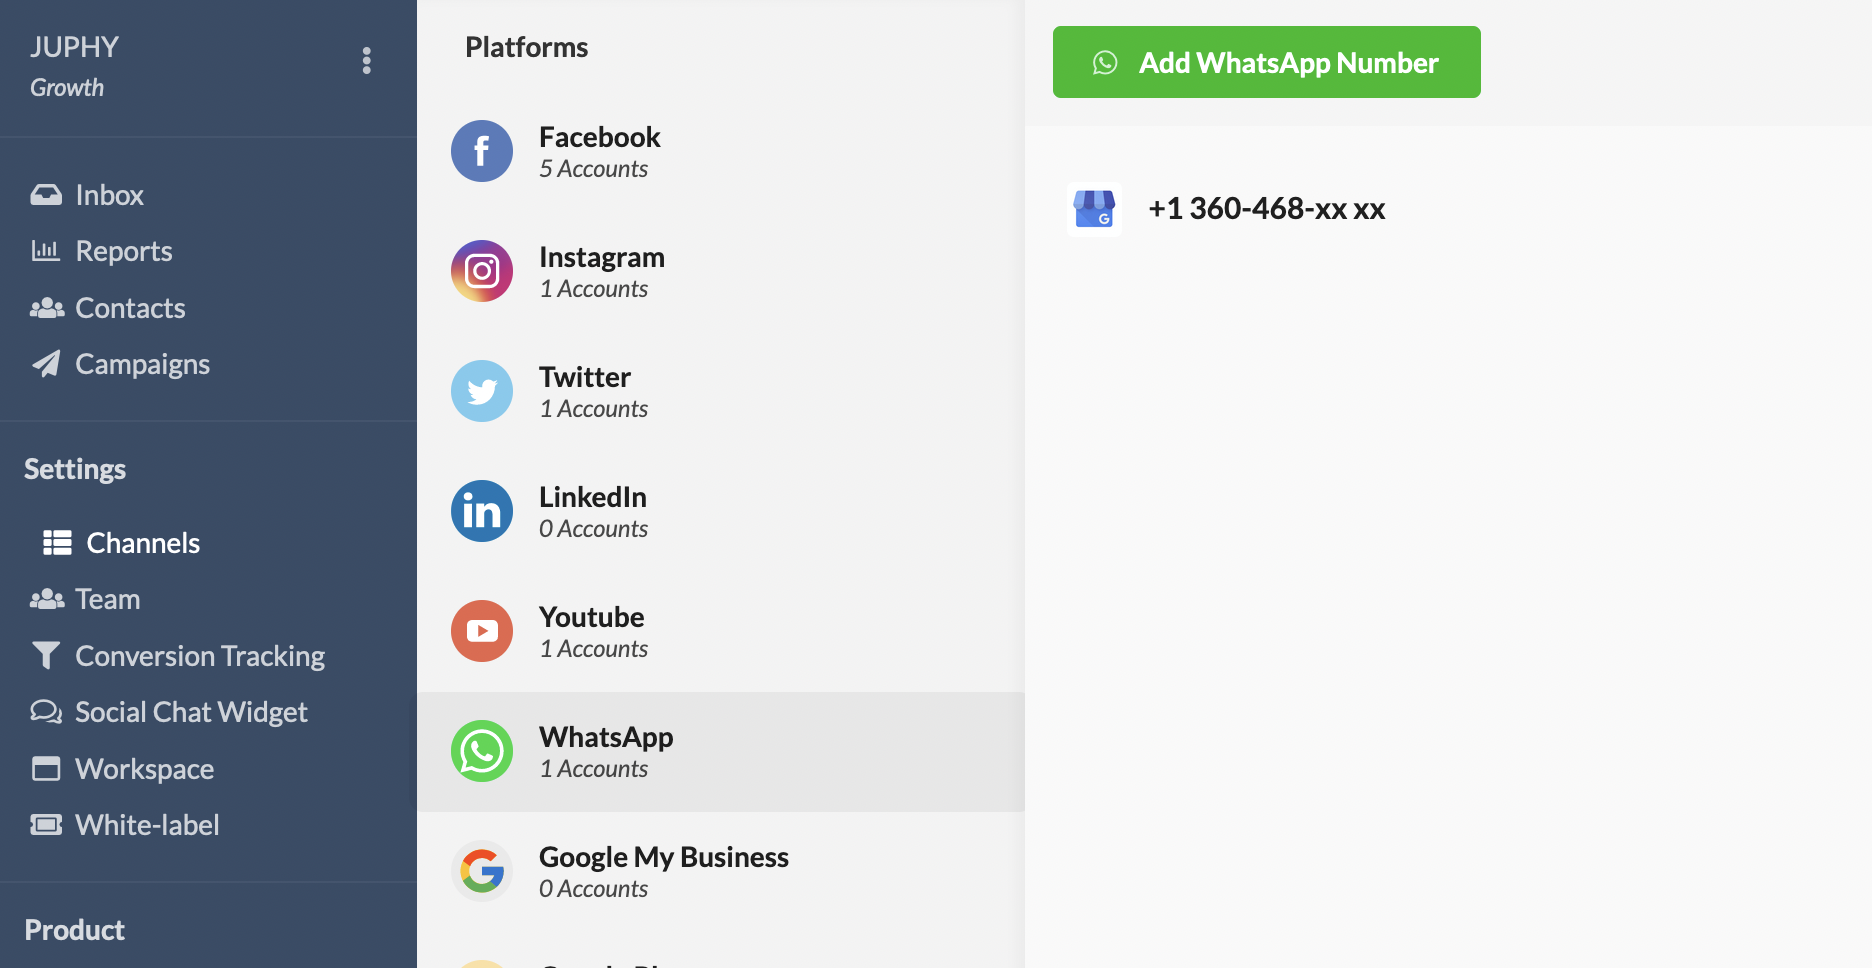
Login to the dashboard and go to the WhatsApp channel section https://app.juphy.com/accounts/whatsapp and click Add Whatsapp Number button.
If you have any questions, just let us know through live chat. We’re always ready to help 🚀