How to Add Facebook Chat Plugin to Your Website
Doga Kıbıcı
Social customer service has become an ongoing process for every new business made in these modern times. Rather than supporting customers with classic methods, firms try to do it through online social platforms that we all know such as Instagram, Twitter, or Facebook. As a side of their presence on these platforms, businesses must have websites and tools that have to be used to ease their workload online. So this is where specific plugins come in handy; in this case, we will talk about Facebook Chat Plugin.
What is Facebook Chat Plugin?
Facebook Chat Plugin is an extension that you can use to create a pop-up at one corner of your website. This pop-up allows the customer to contact you through and by Facebook. You can only have it if you have a Business Account, and by clicking the Messenger button on the chatbox, it enables the customers to chat with you.
The plugin lets you answer customer questions, deal with problems, and run your customer support process.
Now that we know what Facebook Chat Plugin is, we can start to understand it better by learning how to set one up for your website.
How to Set Up Chat Plugin on Facebook
Before starting, you have to check some steps like having a Meta Business Suite account linked to a Facebook page for your website. Then, of course, you have to be the admin to your account to monitor it, don’t forget to permit ‘pages_messaging’ from your settings. After making sure you meet these requirements, here are the steps you have to follow:
1st Step: Go to your Facebook page. Once again, make sure you’re the admin and make changes as the admin.
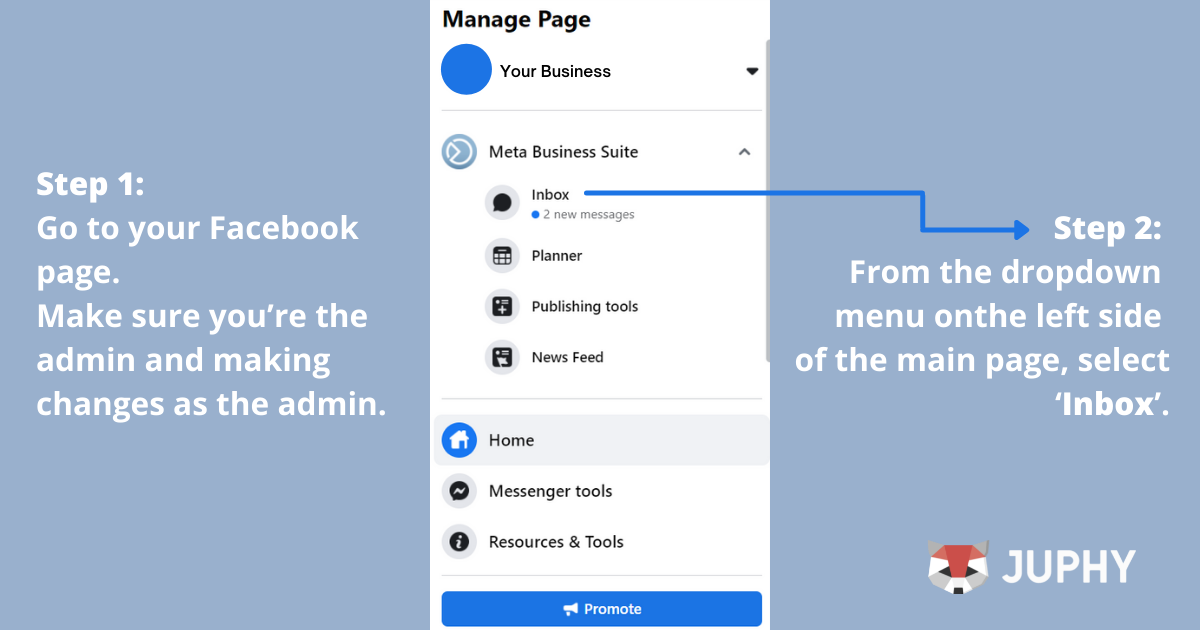
2nd Step: From the dropdown menu on the left side of the main page, select ‘Inbox’.
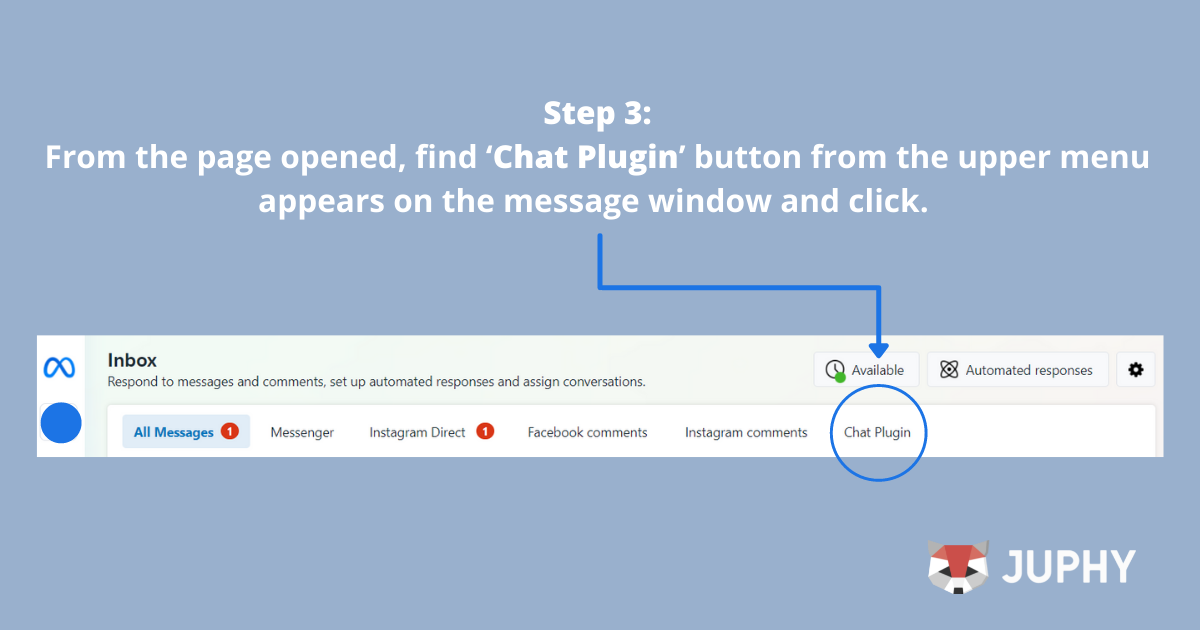
3rd Step: From the page opened, find the ‘Chat Plugin’ button from the upper menu that appears on the message window and click.
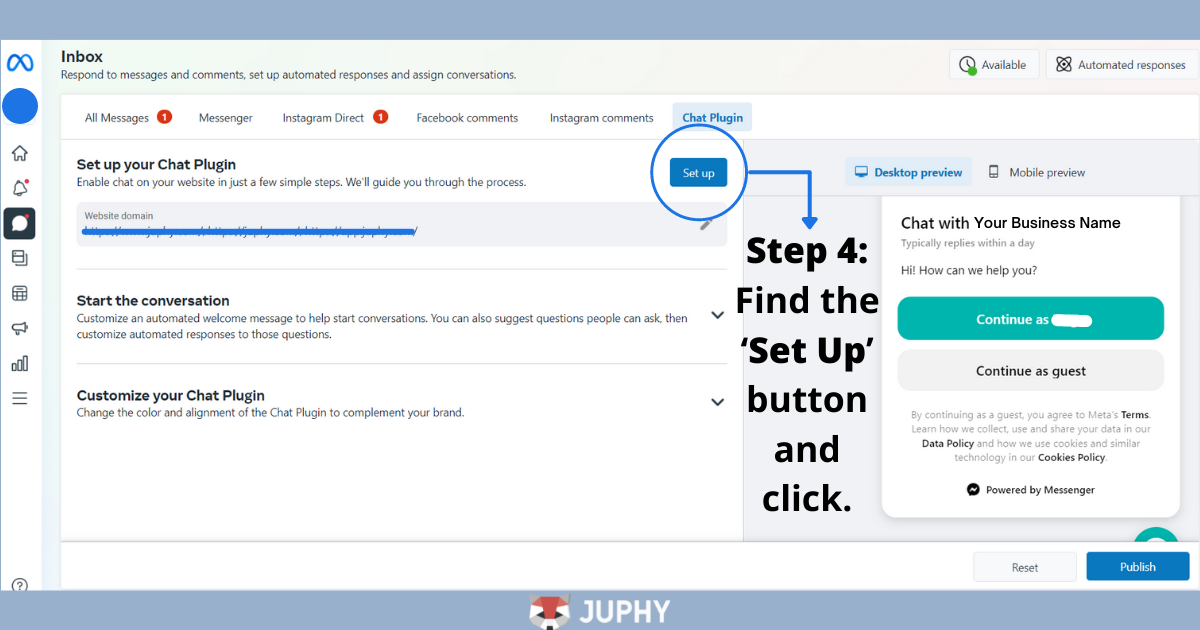
4th Step: Type your website domain of the websites that you want the Chat Plugin to pop up. Then click on the ‘Set up’ button.
In the next step, you’ll pick the setup method and follow the instructions accordingly. Three choices will be served, and they’re listed below.
- Choice of adding the plugin to your WordPress homepage.
- Adding the plugin by using Google Tag Manager.
- Doing it the Standard way. You get the code to add the plugin on your website, to do that, you’ll need to include Facebook SDK for JavaScript implementation code.
For the 3rd choice of Facebook SDK for JavaScript, you might need some coding knowledge. However, if you’d like to try it for yourself, Facebook has its own guide to help you along the way. You can go to Facebook’s Meta for Developers page and follow the instructions here.
How to Use Facebook Chat Plugin with Bots
You can set up a bot message to answer particular messages or just a basic greeting template on the Facebook Chat Plugin. This way, when it’s actually needed, your customer service team will get in contact. It might also help the customer by leading them to solve their problems without even tiring your customer support team, which is a wonderful feature.
You can be present in one place but monitor two simultaneously. Managing customer service issues or answering questions from the same place as in your Facebook page’s chat inbox might feel relieving and be an easy process. You don’t have to keep track of two different inboxes this way.
Thus, really specific commands are only possible if you know how to code, aka using the API. Facebook calls these bot messages the ‘ice_breakers’. If you want to know how to set them also, visit here.
But don’t worry! You’ll still be able to have an Automated Welcome Message and responses to frequently asked questions without getting your hands dirty with some coding. When setting up the Chat Plugin, it appears below with the option of customizing your chat pop-up.
Benefits of Using Facebook Chat Plugin
No need for another live chat tool
If you’re not new to this, you might already know that some tools exist just to solve the live-chat box problem for businesses. If you’re new, let me explain it to you.
Live chat boxes are basically chat boxes that usually appear on the right bottom corner of a website when you enter it. They might pop up and want to help you with something, or in case of a problem, you type it on the chatbox. It’s either a bot that’s answering you or a real-time person.
As serving this kind of service might not be the case for some businesses, Facebook already has this issue solved for people with Meta Business Suite account holders easily.
People are already logged in
If people have already been keeping their accounts open on their browsers or phones, it’s even better and easier for them to reach out to you. When they see your chatbox, it’ll give them the choice of continuing as themselves or as a guest. See the below example for a better idea of how it looks.

Chat history is available
When you finish up a conversation, it doesn’t actually disappear. That conversation creates and saves its history in need of future usage. This way, your conversations are kept saved and sound forever under the guarantee of Facebook.
Requirements are easy to be met
To set up a chat plugin for your website, the requirements to be met are pretty easy for users. You have to have a Facebook Page, and the rest is instructions. This saves you a lot of stress on how to do it.
Integrating Your Facebook Page/Group with Juphy
With its other various integrations, Juphy once again has you covered. Facebook integration and its features will make your job much easier.
In this part of the article, we’re going to learn how you can integrate your Facebook page or group to your Juphy dashboard and how you can monitor them inside.
1st Step: Login to your Juphy account.
2nd Step: Choose the workspace you want to integrate with your Facebook page/group.
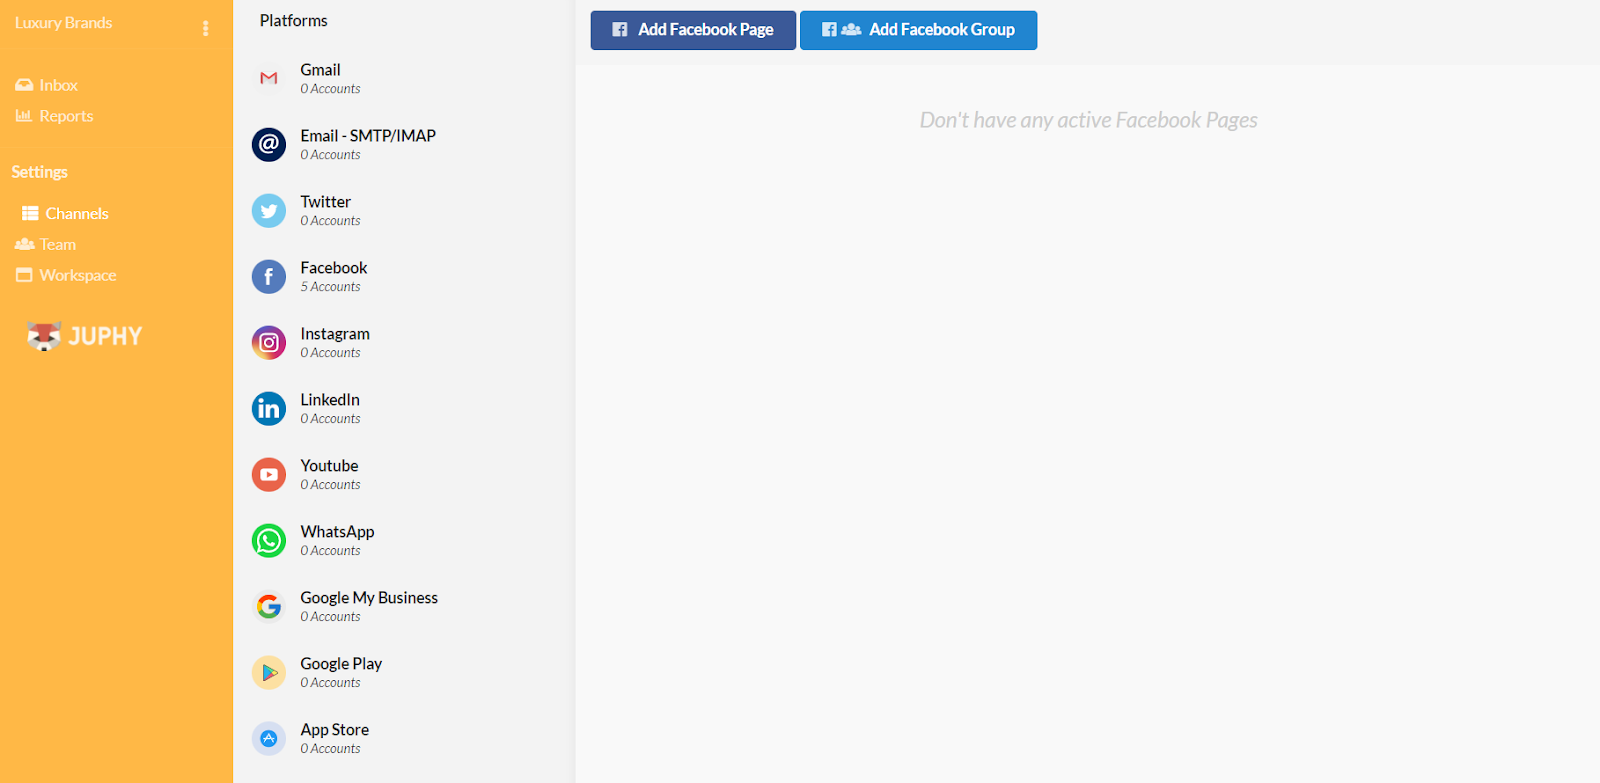
3rd Step: When the main dashboard opens up, see the left menu, then find ‘Channels’ under the ‘Settings’ and click.
4th Step: Find the ‘Add Facebook Group’ button on top of the page and click. But don’t forget: In order to connect a Facebook Group with Juphy, it needs to be connected to a Facebook Page!
5th Step: If you need to add your page first, click on it. Facebook will take you to its own page automatically and will require your login details for your Facebook account. Then it allows you to choose the Facebook pages that you’re the admin to. When you choose, you proceed.
6th Step: After you let Juphy and Facebook reach out to your account; to add your group, you once again click on the ‘Add Facebook Group’ button, and the groups that you’re the owner of will show up on your dashboard.

Juphy’s Facebook Features
Now that we’re done with the easy steps or integrating your Facebook page/group to your Juphy account, it’s time to get to know some of our features to monitor your notifications from Facebook better!
- Managing Comments and Messages
If you previously used Juphy for another channel and integration, you may already know that all of your notifications from integrated platforms drop into your ‘Inbox’. Inboxes are separate for each workspace for a better experience and to be able to monitor in an organized manner.
For Facebook integrations, you can see and monitor:
- Direct messages
- Comments
- Ads Comments
that drop into your inbox.
- Tracking Keywords on Facebook Page/Group
Some keywords are too important not to miss in a comment or a message. For example, if you want to keep track of the words ‘price’ or ‘how much’ to help your community actively, then this feature is for you. By tagging the keywords or word groups, the messages, including the keywords you set, get categorized under the tag you created as they come in. To know more about this feature, visit our automation rules page!
- Canned Responses
Are you getting the same question all over again all the time? Do you need a fast solution to answer similar customer queries? Well then, previously set responses will save your life!
In Juphy we call them canned responses, and they can be created separately for every other workspace and channel! To start creating templates for your responses, visit our canned responses feature page!
*All of Juphy’s features have their own guiding videos. You can reach out to them from their feature pages on Juphy’s website or simply check out our Youtube page!
Conclusion
To put a final word into it, it’s nice to keep things all together. By setting up your plugin, you’ll be able to contact customers without trying to get their contact information and plus, be able to see the conversation history for every other interaction. As it’s cheaper than purchasing a live-chat box tool, it’s also reliable because of the Facebook name behind it. Set your chat plugin today and improve your social customer service!
Related Article